

You approved the artwork three weeks ago. The dieline looked clean on screen, the 3D mockup sold the idea to your team, and the first production run is booked. Then a filled sample lands on your desk. The zipper sits under a fold, the base bulges sideways, and the product stops two centimetres short of the seal.
Nothing is defective. The specification was never tested against what goes inside.
That gap is why a first pouch order so often costs more than the second one. A stand up pouch isn't a bag with a printed front. It's a working system where structure, film, closure, print and product fit push against each other, and changing one moves the rest. The sequence that avoids the expensive lesson is fixed, and each step depends on the one before it.
Table of Contents
- Stand Up Pouch Types at a Glance
- How the Gusset Base Gives a Stand Up Pouch Its Stance
- Materials and Barrier Layers That Protect the Contents
- How Seals, Zippers and Spouts Affect Performance
- Print Options and Finishes for Shelf Presence
- A Five-Sided Gusset Flower Pouch in Practice
- Cost and End-of-Life Trade-Offs for Budget Products
- Confirm Your Pouch Spec Before You Order
Stand Up Pouch Types at a Glance
Two pouches of the same size sit side by side on a shelf. One stands square to the aisle with its front panel flat and readable. The other slumps forward and disappears behind whatever sits next to it. Same film, same print, same fill weight. The base makes the difference.
A stand up pouch is a flexible package whose base or gusset holds it upright without the rigid walls of a bottle, jar or can. Every later decision, from film build to zipper placement, sits on top of that base choice.
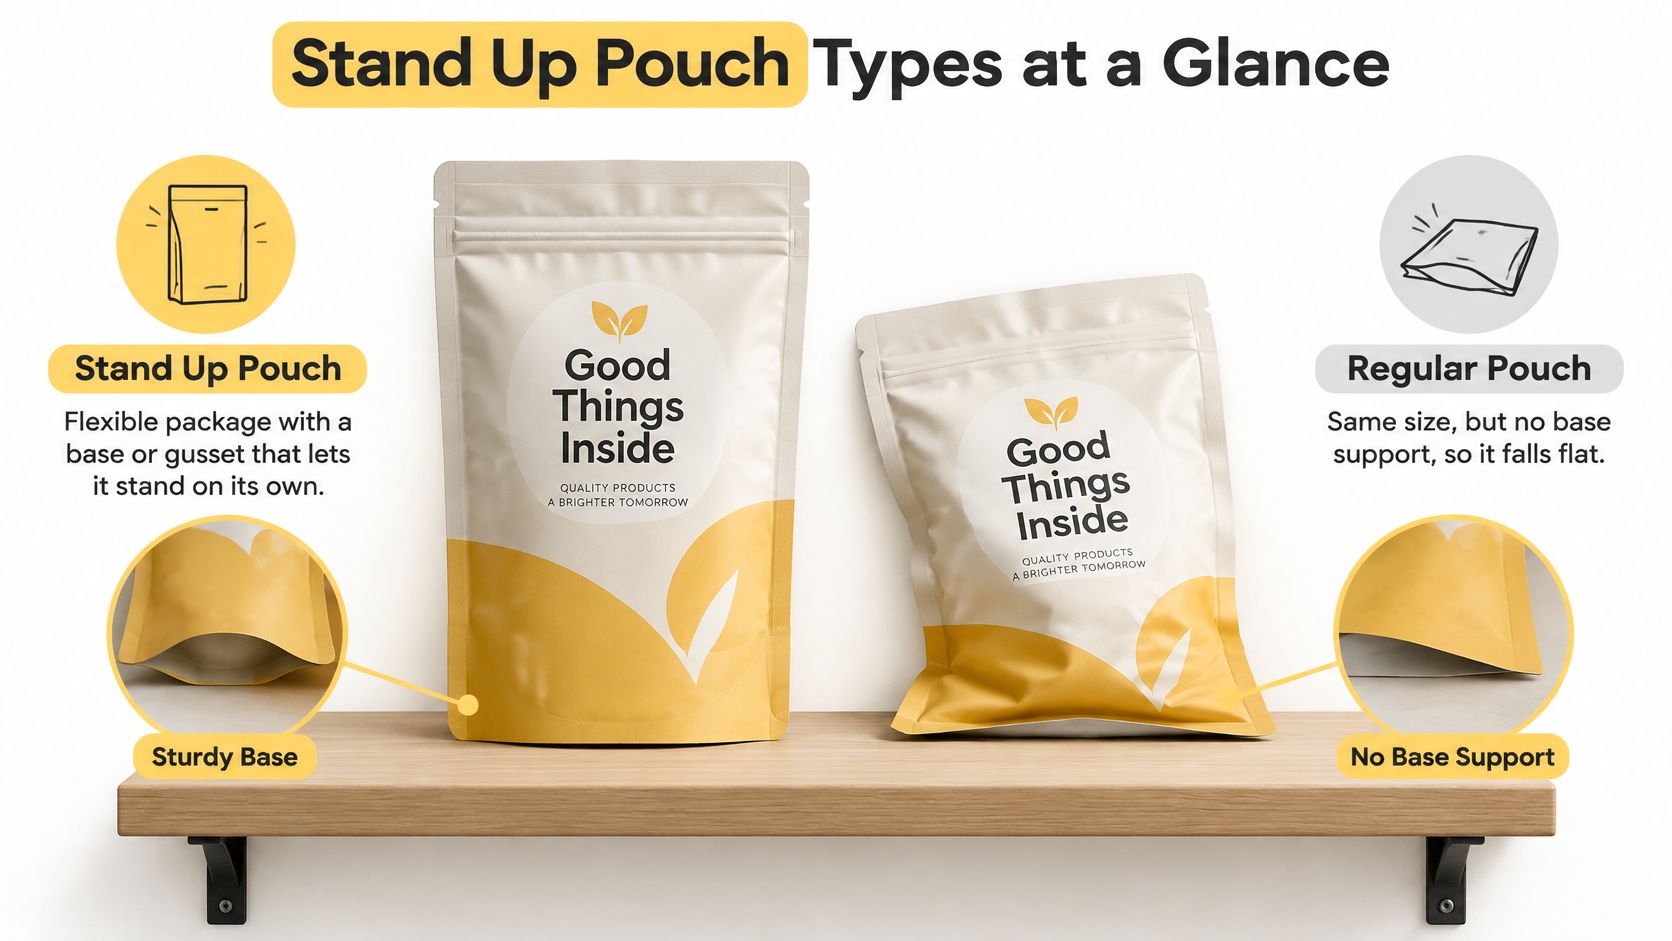
Four structures cover almost every project a first-time buyer brings in.
Layflat pouches are two flat panels sealed on three sides. They use the least material of any format here and print beautifully for flat display, and they never stand up on their own. That's fine when the product hangs on a peg or ships flat inside a carton.
Gusseted pouches add a folded bottom gusset and stand once they're filled. The catch is arithmetic. A shallow gusset produces a strained, rounded pack that rocks instead of standing, while a deep one folds unpredictably and narrows the front panel.
Three-sided gusset bags, the coffee-bag shape most buyers picture first, have gusseted side panels and a sealed top. Roasted coffee and dry goods live here, usually with a degassing valve and a zipper.
Five-sided gusset bags expand the base and add side panels. You get the widest front panel, the most stable stance and the most usable room, which is why flower and other bulky premium products use them.
| Structure | Stands on its own | How it is built | Best fit | Watch for |
|---|---|---|---|---|
| Layflat pouch | No | Two flat panels sealed on three sides | Light products, flat display, lowest material use | Small front panel, no independent stance |
| Gusseted pouch | Yes, when filled | Flat panels with a folded bottom gusset | General consumer goods needing a standing front | Gusset must match fill volume |
| Three-sided gusset (coffee-bag style) | Yes | Gusseted body with a sealed top | Roasted coffee and dry goods | Needs valve and headspace planning |
| Five-sided gusset | Yes, most stable | Expanded base and side panels, often with a front window | Bulky or premium products needing display and room | Higher cost, and the window must protect contents |
Structure sets capacity, stance and printable area before anyone discusses film. A pouch that stands perfectly but holds 20 grams less than the label claims is a worse outcome than a plainer structure that fits.
How the Gusset Base Gives a Stand Up Pouch Its Stance
A tent stands because a frame holds flexible fabric open under tension. Remove the frame and you're holding a pile of nylon. A stand up pouch works on the same principle: the film is the fabric, and the base or gusset is the frame that keeps it open once the product loads it.
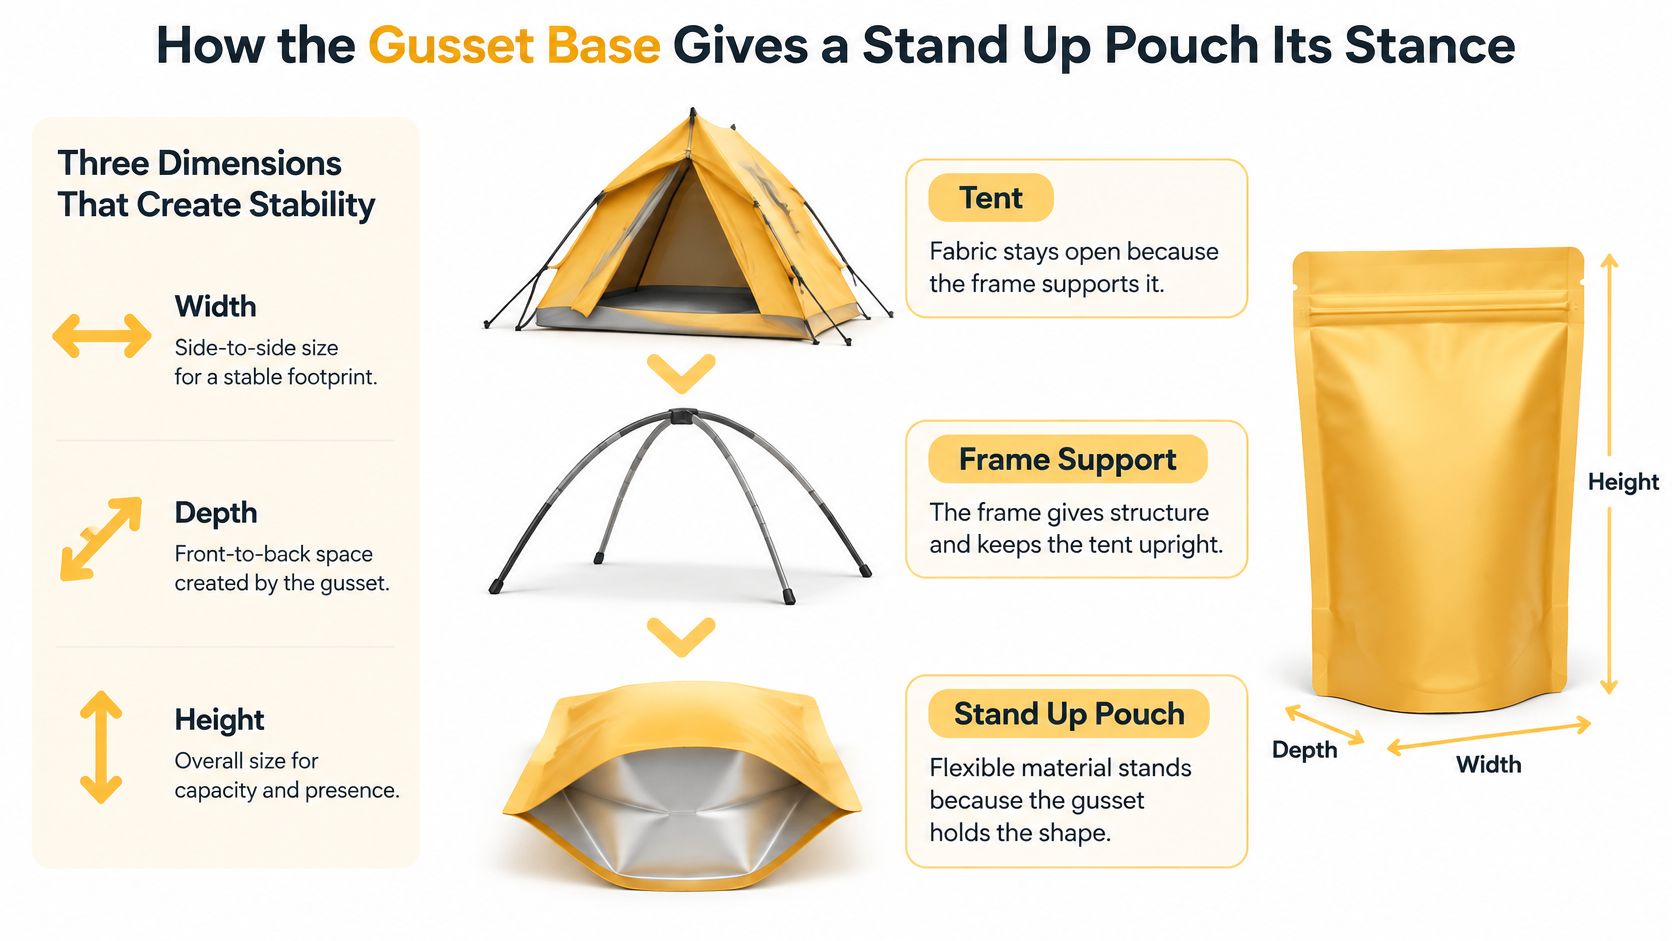
Three dimensions have to be settled before a converter can quote you anything useful: width, height and gusset depth, expressed the way the trade writes them, as width × height × gusset. Add the net weight of the product and the filling tolerance your line can hold, because the gusset has to match the fill volume, not the empty bag.
A quick starting volume comes from multiplying width × height × gusset, and it's only a starting point. Too shallow a gusset and the filled pack looks strained and rounded. Too deep and the base folds unpredictably while the front panel narrows, which costs you the branding, the product information and the regulatory text that panel carries.
Rule of thumb: the gusset should let the filled pouch sit flat on its own footprint without the base bulging past the sides.
This geometry has a lineage worth knowing. The stand up flexible pouch is generally attributed to French inventor M. Louis Doyen, who developed a pouch with a separate base panel that allowed it to remain upright. The design was named Doy Pak, later commonly written as Doypack, and Doyen introduced it in France, other European markets and the United States during the 1960s, with limited early acceptance, as the Institute of Food Technologists recounts in its history of the format. Early applications included olives, fruit beverages in Europe and specialty candies.
That base turned a flexible bag into a shelf format with a printable front, and later versions kept the same geometry while adding zippers, spouts, fitments, tear notches, handles and high-barrier multilayer films. The format was a structural innovation, not a flat bag restyled for appearance.
Before you speak to a converter, write down three numbers and one weight: width, height, gusset depth, and the net weight of a single filled unit.
Materials and Barrier Layers That Protect the Contents
A laminate is a jacket with layers, and each layer has one job. The outer layer takes the printing, the scuffs and the shelf lighting. The middle blocks whatever would ruin the product. The inner layer becomes the seal that holds everything in.
| Layer or structure | Job in the pouch | Barrier reference | Recycling note |
|---|---|---|---|
| PET-based retort structure | Printable outer layer and stiffness | OTR 0.20 and 2.11 cc/m²·day | Single-material PET streams sort more cleanly than mixed laminates |
| EVOH-based retort structure | Oxygen barrier layer | OTR 0.07 cc/m²·day | Multilayer, hard to separate |
| Tested retort structures (range) | Moisture barrier across the set | WVTR 0.29 to 2.64 g/m²·day | Recovery depends on the full structure, not the barrier alone |
| PE-family sealant layer | Heat seal and flexibility | Seal function, not a barrier layer | Recovery depends on local PE streams |
| Aluminum foil or metallized film | Light and oxygen barrier | Very low transmission, also blocks light | Hard to separate, check accepted routes |
Read that table as an order of work rather than a menu. You pick the sealant first, because it decides whether the pouch seals cleanly through your product at your fill temperature. Then you add the barrier the product needs. Then the outer layer for print and stiffness.
OTR is oxygen transmission rate: how much oxygen crosses one square metre of film in a day. WVTR is water-vapour transmission rate, the same idea with moisture. Published retort-pouch measurements show how far apart structures can sit, with PET-based structures reporting OTR values of 0.20 and 2.11 cc/m²·day, an EVOH-based structure measuring 0.07 cc/m²·day, and WVTR across the set running from 0.29 to 2.64 g/m²·day, as documented in this review of retort pouch barrier performance.
Those are measurements from one set of structures. They are not specifications you can copy onto a purchase order, because humidity and temperature change how polymers and coatings perform.
A usable specification states the test conditions, the target shelf life, the product's water activity, the headspace strategy, and whether the pack will meet heat or retort processing. ASTM F1927 is the recognised method for measuring oxygen transmission through barrier materials at controlled relative humidity.
Practical rule: write your OTR and WVTR targets down before you look at a single film sample.
Then test filled, production-intent pouches after sealing and any conditioning step. Film-only data misses defects, channels, wrinkles and gusset stress created during conversion and filling. If you're still comparing substrate families, this breakdown of packaging material types covers the wider menu and where each one earns its place.
How Seals, Zippers and Spouts Affect Performance
An envelope holds its contents because the glue line runs without a break. Lift one corner with a thumb and the whole seam peels. A pouch perimeter seal behaves the same way, and it carries every load the pack meets from the filling nozzle to the retail shelf.
Each closure changes what the consumer can do with the pack, and each one changes what the seal has to survive.
| Closure | What it does | Best for | Trade-off |
|---|---|---|---|
| Reclosable zipper | Lets the consumer reseal after opening | Products opened repeatedly | Trapped oxygen and headspace can shorten shelf life, and placement must clear the seal |
| Tear notch | Opens without scissors | Single-use or portioned products | Weak point if the seal is poor |
| Spout or fitment | Pours or dispenses liquids | Sauces, drinks, liquids | Adds seal and leak risk, and cost |
| Degassing valve | Releases gas from freshly roasted product | Roasted coffee | Needs valve clearance checked in the filled test |
| Hang hole or handle | Supports retail hanging or carrying | Retail display | Adds sealed area and load on the seal |
A zipper is a usage decision, not an automatic shelf-life gain. Once the pack is opened and pressed shut again, the headspace above the product still holds oxygen, and for oxygen-sensitive products that trapped air works against the remaining shelf life. The convenience of reclosing can be outweighed by what the closure traps. Match the zipper to the product's actual shelf-life requirement and test it on filled packs, rather than adding one because the format allows it.
The zipper also sits below a tear-off header, which means the consumer rips through a sealed section of film to reach it. That header seal has to hold the pack closed until first opening and still tear cleanly at the notch. Two jobs, one seal line.
What to test, and at which settings
ASTM F88/F88M measures the force required to separate a sealed flexible-material specimen and records the failure mode, which makes it the right tool for comparing sealant resins, sealing temperatures, dwell times, pressure and contamination tolerance, per the ASTM seal strength standard.
Peel strength alone doesn't prove reliability. Flexible packages commonly fail at one or more perimeter-seal locations when internally pressurised, so burst testing belongs in the same qualification. Test minimum and average seal strength, failure mode, seal width and visible channels across the operating window, not only at the machine's nominal settings.
Stand-up geometry concentrates stress at the bottom gusset and the corner transitions where folds meet seal intersections, and a small wrinkle there becomes a channel that leaks. Specify adequate seal land, control pouch flatness during sealing, and validate zipper placement relative to the primary seal. Structural design work also accounts for closures, inserts, assembly steps and how packs sit in a shipping carton, so a poorly placed fitment can force an awkward case pack and raise your freight cost per unit.
Test the seal at the edges of the machine's operating window, not in the middle where it always looks good.
Then repeat the tests on filled units after vibration, drops, compression and temperature conditioning. Pick the closure from the usage pattern (open once, reopen often, or pour), and list the seal tests it demands before you approve anything.
Print Options and Finishes for Shelf Presence
The front panel is your shop window. A shopper spends about as long reading it as it takes to walk past, so the question isn't whether the print is beautiful. It's whether it's legible at arm's length under store lighting.
Each print method carries one trade-off worth knowing before you request quotes.
- Flexographic printing handles high volumes efficiently, but plate setup adds cost that has to be spread across the run.
- Rotogravure reproduces fine detail with engraved cylinders and suits very large runs, where the cylinder investment finally pays back.
- Digital printing gives you short runs and fast proofs with no plate cost, at a higher unit cost once volume climbs.
- Short-run and prototype printing covers launch quantities, market tests and the physical mockups you'll want before committing.
No fixed run thresholds exist that apply to every converter, so ask yours for the break-even quantity at each size you're considering.
Finishes change how the panel reads before anyone processes the words. Foil, debossing and embossing only work on suitable stock. Matte and gloss shift how the front behaves under overhead lighting, and a premium finish that swallows the net weight is a bad trade.
Keep the hierarchy honest. Readable information, distinct variant names and consistent presentation make a package easier to understand, and decorative finishes shouldn't obscure quantity, identity or other approved information. Presentation is also the subject of this look at what makes customers pick your product in three seconds, which is roughly the window you're designing for.
Before any finish is chosen, list what must appear on the panel: identity, variant, net quantity, and whatever the category requires. Then check the proof against the dieline. Artwork goes onto the approved dieline, and folds, cuts and safe areas are verified there, because a beautiful label that crosses a gusset fold reads as a printing fault to the buyer holding it.
A Five-Sided Gusset Flower Pouch in Practice
Take a bulky, loose product like dried flower. It bruises under compression, it takes up a lot of volume for its weight, and buyers often judge it by appearance. The pack therefore has to do two things at once: hold its shape without squeezing the contents, and give the customer some way to evaluate what is inside.
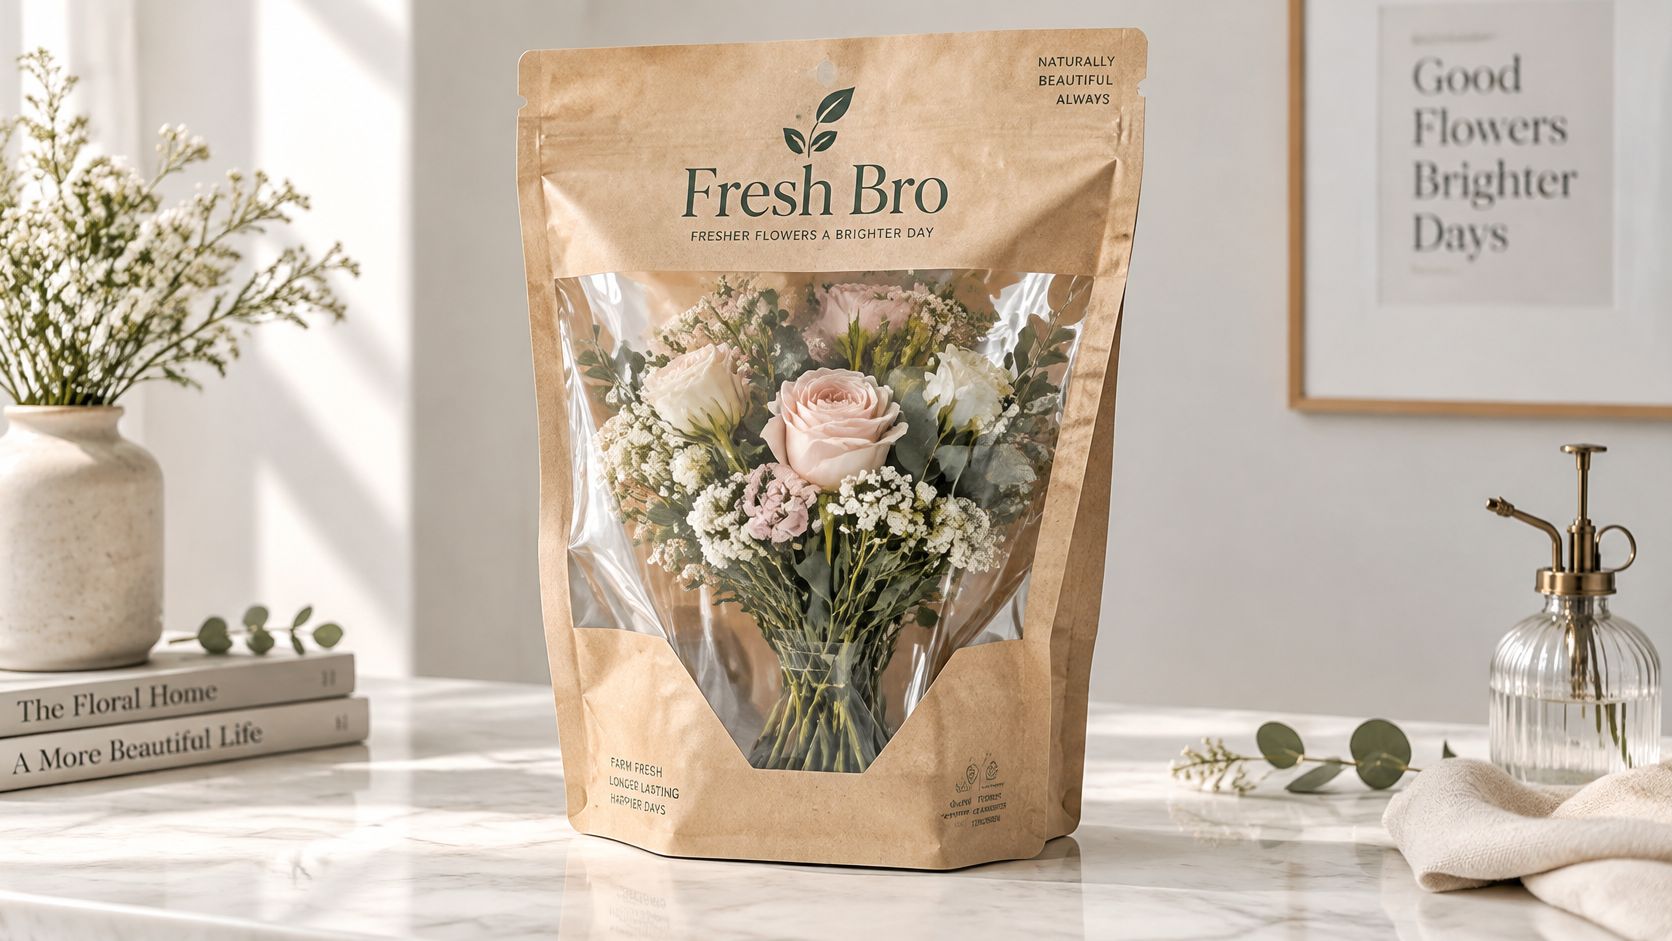
A five-sided gusset construction handles the first half of that problem. The expanded base and side gussets create interior volume the front panel does not have to provide, so the filled pack stands upright on its own footprint rather than leaning on the product next to it. Many designs then add a front window, so the product itself does the selling instead of a printed photograph of it.
Gusset geometry drives usable capacity as much as it drives looks. A technical buyer guide describes bag dimensions as width × height × gusset and warns that a gusset too shallow creates a strained, rounded pack, while one too deep can fold unpredictably or make the front panel look narrow, as set out in this guide to coffee packaging bag structures. The same source adds that the bottom style controls shelf presence and how much product the bag holds, and recommends sizing around the product's net weight and physical form while leaving headspace for sealing.
On a windowed pouch like this, three decisions move as one system.
The window changes the barrier. Clear film leaves the contents exposed to light and oxygen, so the rest of the laminate has to carry protection the window cannot provide.
The window changes the layout. It has to sit clear of seal lines and leave room for required label information, which usually pushes the branding to the upper panel.
The extra room changes the sizing risk. A spacious pack invites overfilling, and overfilled flower arrives bruised. Test fit with your product in the selected pouch size before a print run, and let the filled sample tell you whether the base still stands flat.
Decide first whether the product should be seen through the pack. If it should, budget for a stronger barrier elsewhere in the structure and review a filled physical prototype before committing to the final structure.
Cost and End-of-Life Trade-Offs for Budget Products
A budget product feels every gram of packaging twice: once when you buy the material, and again when the market decides what happens to it after use. Flexible packaging earns its cost reputation on the first count. The second count is where the trade-offs live.
| Format | Packaging discarded at end of life | Product share of packed weight | Estimated recycling rate |
|---|---|---|---|
| Rigid HDPE canister | 162,442 g | Not reported | 18% |
| PE-based stand up pouch (evaluated formats) | 35,219 to 42,394 g | 95.9% to 96.6% | 3% |
| Rigid PET container | Not reported | 84.4% | Not reported |
Under the study's 1,000-kilogram product scenario, the evaluated pouch formats discard roughly 74% to 78% less packaging mass than the rigid HDPE canisters, while also showing lower estimated recovery, according to this stand-up pouch lifecycle comparison. The trade-off is the point. A pouch sends far less material to end of life, but a smaller share of what it does send comes back through recycling. Material efficiency and end-of-life performance are separate scores, and a good spec tracks both.
On cost, a flexible pouch requires approximately 75% less material than a rigid container for the same quantity of goods, and raw materials, energy, printing and converting, equipment and labour together account for roughly 50% to 60% of total production cost, per this flexible packaging procurement analysis. Products that must stay extremely price-competitive land in pouches for exactly this reason.
The film quote is only one line on the invoice. Final economics still depend on film construction, printing, closures, order volume and manufacturing method, and a cheap specification turns expensive when the product does not fill or ship as planned, or when a barrier layer or printed claim forces a redesign after the first run.
The gap between recyclable and accepted
Germany's 2025 minimum recyclability standard explicitly includes stand-up pouches and evaluates the complete structure, covering barrier layers, adhesives, inks, closures, sortability and available recycling routes, as the minimum standard for packaging sets out. The EU Packaging and Packaging Waste Regulation pushes the same direction, requiring packaging components to be compatible with collection, sorting and recycling systems, with design for material recycling becoming a requirement on a phased timetable.
Separate the words. Recyclable describes a design intent. Accepted describes what the local system will actually take from a consumer's hand.
A pouch engineered in PE or PP can still fail every one of those checks once incompatible barriers, zippers, spouts, metalized films or product residue enter the structure. Material choice drives the end-of-life result more than any claim printed on the front panel, and this resource on choosing sustainable packaging materials is a useful companion when you weigh recovery against protection. The wider direction of travel sits in these sustainable packaging trends for consumer-facing brands.
Confirm the recovery route in each market you sell into before anyone writes a recyclability claim on artwork. Structure, barrier, closure and print behave as one system, and the claim on the front panel has to survive all of them.
Confirm Your Pouch Spec Before You Order
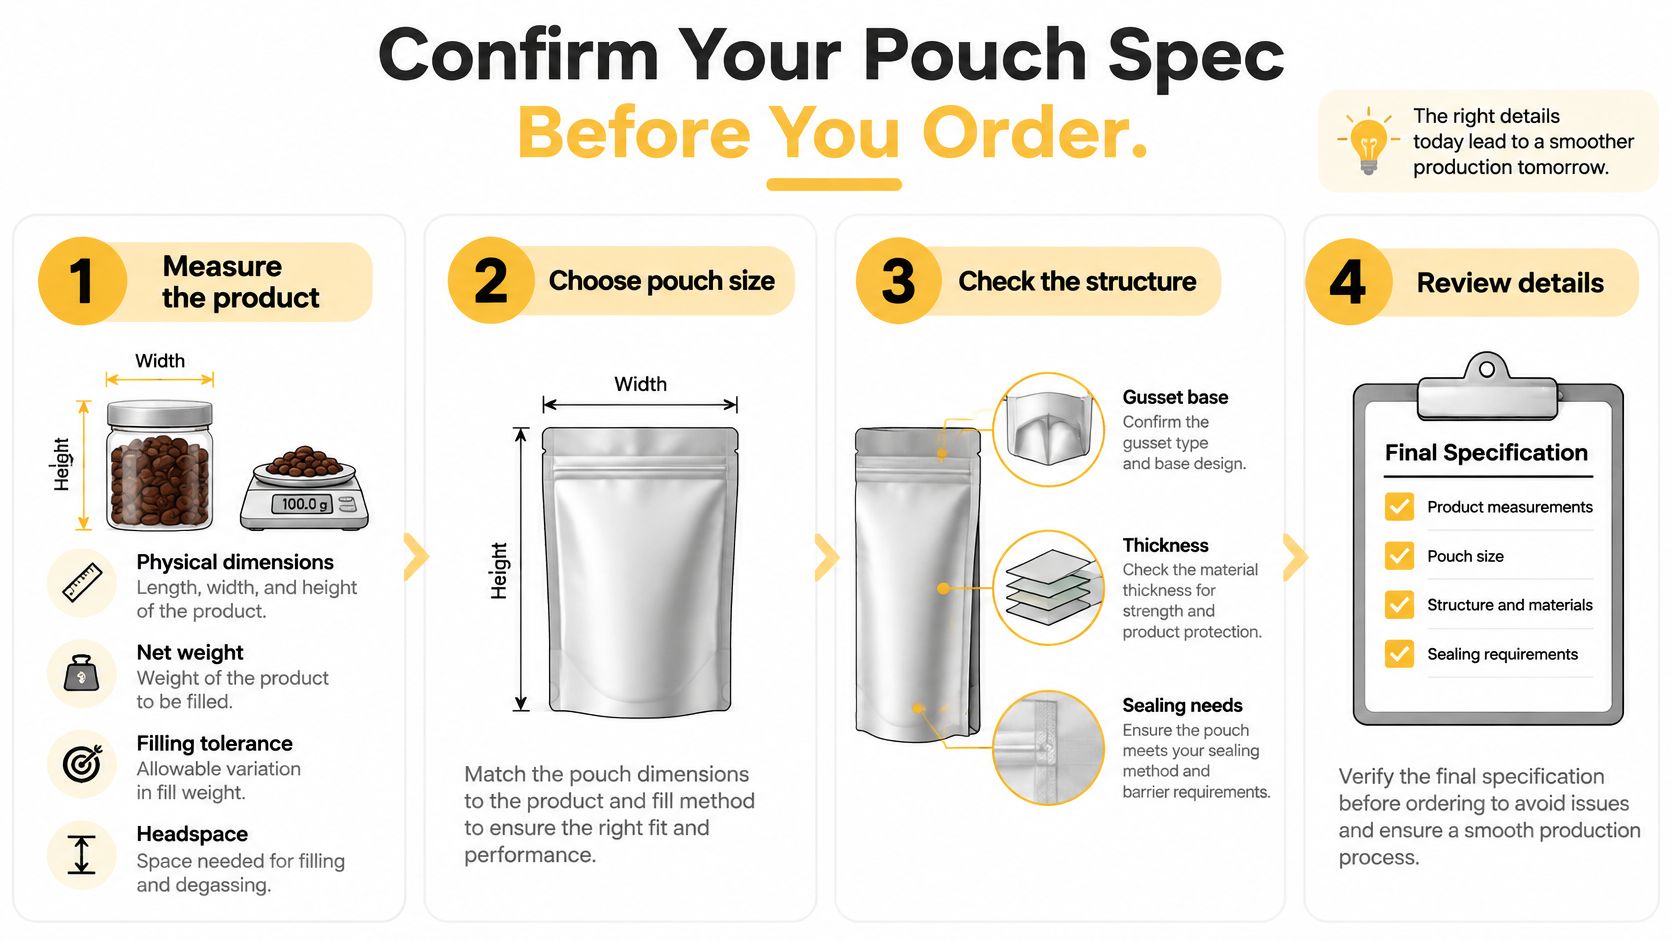
A pouch spec gets confirmed in seven checks, and the order matters. Work through them in sequence, because each one settles a question the next one depends on. Skip a step and the cheapest quote often becomes the most expensive order: a pouch that seals but will not stand, or one that stands on the shelf and splits inside the shipping case.
- Measure the product, not the old bag. Record physical dimensions, net weight, filling tolerance and the headspace the product needs for filling and degassing. Every later check depends on these numbers.
- Calculate a starting volume, then set a range. Width × height × gusset gives a first estimate only, so quote two or three sizes instead of one. Filling behaviour influences the final answer more than the arithmetic does.
- Make a paper mock-up. A folded paper sample shows whether the product physically fits the pouch before any film is committed, and it costs almost nothing.
- Fill production-intent prototypes with the actual product at target weight, then check top-seal clearance, zipper access, valve clearance, shelf stability and case fit. A coffee-packaging technical guide recommends exactly this sequence, calculating an initial volume from width × height × gusset and then filling multiple prototype sizes with the actual product, per this complete guide to coffee packaging bags.
- Condition and test the filled units. Run vibration, drops, compression and temperature first, then seal strength and burst on production-intent samples. Failures surface in that order, so testing in reverse wastes the samples that would have told you the most.
- Check the printed panels against the dieline. Quantity and identity stay legible, and folds, cuts and safe areas sit where they should.
- Approve one assembled proof, then extend. Build one representative packaging proof before scaling the design across sizes, then check the smallest container and the longest variant name. Short names survive a small panel. Long ones do not.
For structural work, the inputs that settle most of the argument are product measurements, weight and physical samples where available, with detailed specifications and 3D mockups reviewed before production. The same fit logic applies beyond pouches. The reasoning behind choosing bottles for live fermentation runs on headspace and pressure as much as on volume, and the pack fails the same way when both are guessed.
Send your packaging partner the measurements, the weight and physical samples, together with barrier, closure and print requirements. Ask what is included, which inputs remain open, and for the minimum order quantity, lead time and sample cost, because a quote without those figures cannot be compared against your budget.
A stand up pouch performs only as well as the specification behind it, and that specification is built from the product's dimensions, weight, barrier needs and filling method. Mylarmen develops pouches under one roof, covering film and closure selection, dielines, prototypes and print production, so the structure, the artwork and the manufactured pack are checked against each other before anything is ordered. Send the studio your product measurements and a filled sample, and visit Mylarmen to start the packaging conversation.
Prepared with Outrank tool