

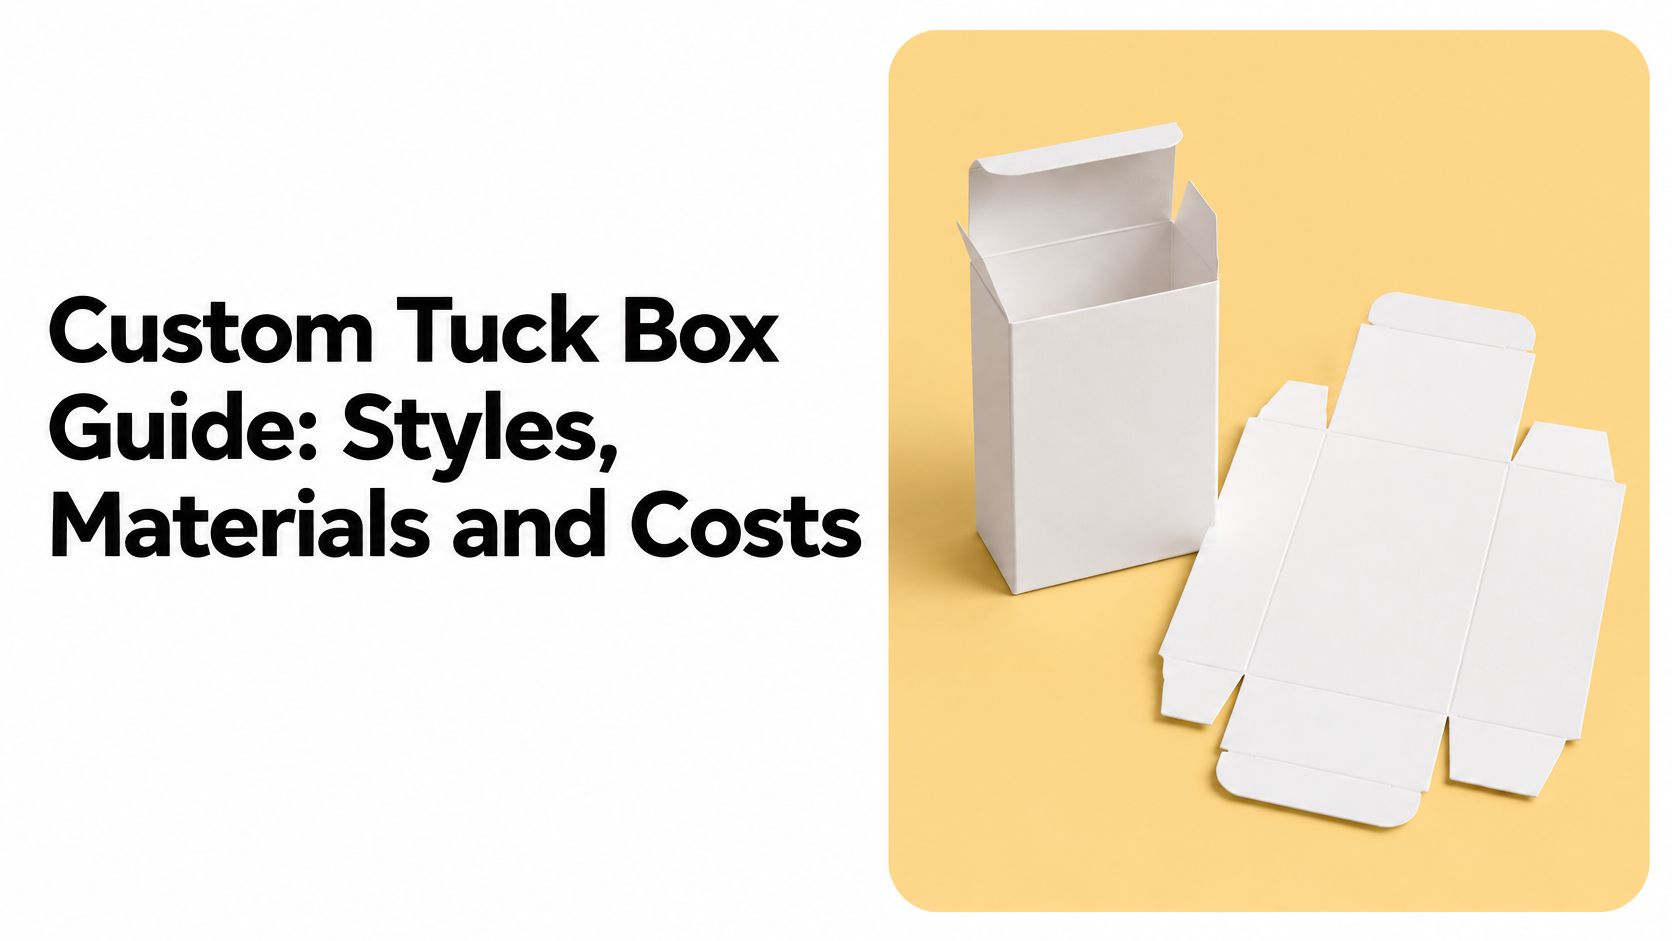
The dieline came from a designer, the product weighs 42 grams, and three quotes in your inbox differ by a factor of four. Two suppliers asked about board caliper and grain direction before they'd put a number on paper. The third quoted from the picture and promised a fast turnaround.
That gap is rarely margin. It's unresolved structure. A tuck box is a folding carton with a closure, a score pattern and a board grade, and all three get locked in before a single graphic lands on the sheet. Get them right and the artwork sits on a box that closes, stacks and ships. Get them wrong and the artwork is the only part of the project that worked.
The decisions run in a fixed order: structure first, then board and surface, then artwork, then run size. Price follows that order, not the other way round.
Table of Contents
- Custom Tuck Box Basics and Format
- Tuck Box Styles and Which Product Each One Suits
- Structural Choices That Decide Fit and Strength
- Board and Surface Materials Compared
- Artwork, Finishes and Recyclability Trade-Offs
- Print Methods, Order Quantities and Cost Drivers
- Confirm Your Brief Before Requesting Quotes
Custom Tuck Box Basics and Format
A supplement brand collects its first print run and the boxes look flawless on the meeting room table. Then a distributor stacks them four deep on a shelf, and inside a week the bottom flap on a slice of the run has crept out of its slot. Nothing was misprinted. The closure was never tested against the weight of a filled carton, and that decision was made long before anyone opened a design file.
A custom tuck box is a paperboard carton die-cut and creased from a flat sheet and closed by tucking flaps into slots. Glue isn't part of the closure and there's no separate lid, so a customer opens it with a thumb and shuts it the same way. The structure belongs to the folding-carton family, a lineage the New-York Historical Society's playing-card and games archive traces through slipcases, push-on lids and tuck-flap boxes into the late nineteenth century.
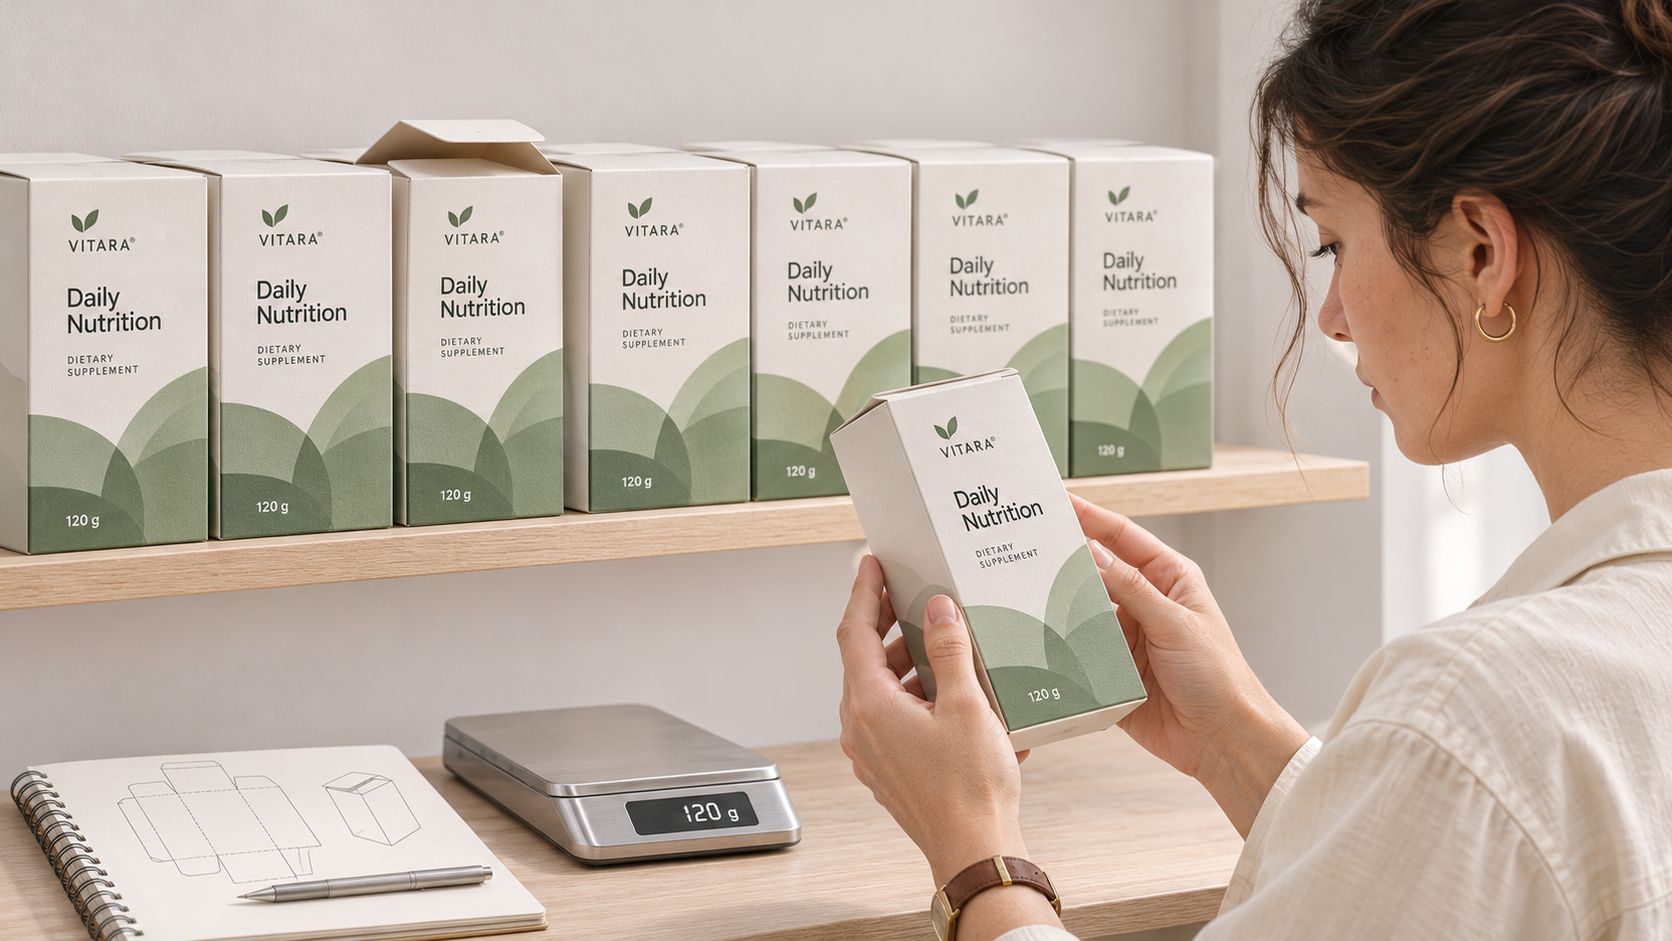
Think of it as a drawer that closes using its own walls. The erected sleeve holds the product, the flaps fold over themselves, and nothing extra is needed to keep it shut. That single mechanism does three jobs at once: it protects a small product, it gives you a printable surface for identity and instructions, and it lets the buyer reclose the pack without hunting for a lid.
What "custom" actually covers
The word gets used loosely. In practice it covers five decisions, and suppliers quote such different numbers because they assume different answers to each one.
- Dimensions: internal length, width and depth fitted to the product, plus clearance for a label, a leaflet or a desiccant sachet.
- Board grade and caliper: the thickness and stiffness that decide whether the flaps stay put in a stack.
- Artwork: the panels, the required information, the barcode, and where the fold lines cut across the design.
- Surface finish: uncoated, coated, laminated, foiled, or something with a window punched through it.
- Print run: the quantity, which decides whether the job goes offset or digital.
If the product is light, compact, and doesn't need a rigid shell, the format fits well. Confirm size and weight before you compare styles or request a quote, because the closure you'll be asked to choose depends on both. When you start comparing print suppliers, this overview of packaging printing at The Print Warehouse shows how a flat sheet becomes a finished, folded carton.
Tuck Box Styles and Which Product Each One Suits
Six structures cover most tuck work. The differences come down to the closure, the extra panels, and the internal layout, so read the closure column first.
| Style | Closure | Best for | Main trade-off |
|---|---|---|---|
| Reverse tuck end | Tuck flaps locked into one end | Trading cards, small supplements, tea | Flaps can loosen under stacking if the score geometry is wrong |
| Straight tuck end | Both flaps tucked, no glue | Light goods, gummies, cosmetic samples | Less secure for heavier contents |
| Crash-lock bottom | Self-locking bottom panel with a tuck top | Retail boxes that must stand flat on shelves | Bottom panel must match the product footprint |
| Hang-tab tuck | Tuck top with a hang-hole panel | Peg-hook retail displays | Extra panel adds board area and cost |
| Window tuck | Plastic window in the front panel | Showing the product at point of sale | Plastic window complicates recycling claims |
| Drawer or divider tuck | Internal drawer or divider | Multi-flavour sets, kits, variant ranges | Higher tooling and assembly complexity |
What each structure buys you
Reverse tuck end is the default for a reason. The top and bottom flaps fold in opposite directions, which balances the box in the hand and spreads load across two faces instead of one. Cards, tea cartons and small supplement packs live here. The failure to watch is a score that's too shallow, which lets the flap relax open once the box carries weight.
Crash-lock bottom exists to solve a retail problem: a box that has to stand upright on a shelf and assemble in seconds on a packing line. The bottom panel locks itself as the carton is squared up, so a filler doesn't have to tuck four flaps by hand. It only pays off when the footprint is sized correctly, because a crash-lock base won't forgive a product that's two millimetres too wide.
The remaining three are variations you add when the shelf or the range demands it.
- Hang-tab tucks buy visibility on a peg display and cost you board area, since the hang panel prints and dyes but carries nothing.
- Window tucks show the product through a punched aperture, and the plastic film behind it is the detail that later complicates a recyclable claim.
- Drawer and divider tucks hold variants apart in one master structure, which suits flavour ranges and kits but adds tooling and hand assembly.
The rule that picks the style
Product dimensions, filled weight, the way the box reaches the buyer, and whether the customer opens it once or lives with it for months.
Start with three numbers and one question. Length, width and depth of the product, the filled weight, and how the box sits in the world: flat on a shelf, hanging on a peg, or nested inside a shipping carton. The question is whether the box is opened once and discarded or reopened every week.
Shortlist two or three styles on those answers before structural engineering starts. Changing a closure after the dieline is approved means paying for new tooling, and no artwork decision is expensive enough to justify that.
Structural Choices That Decide Fit and Strength
A dieline is a structural drawing, not a flattened picture of a box. The panels have to hold a filled product in a stack, survive a parcel network, and still open smoothly in a customer's hands.
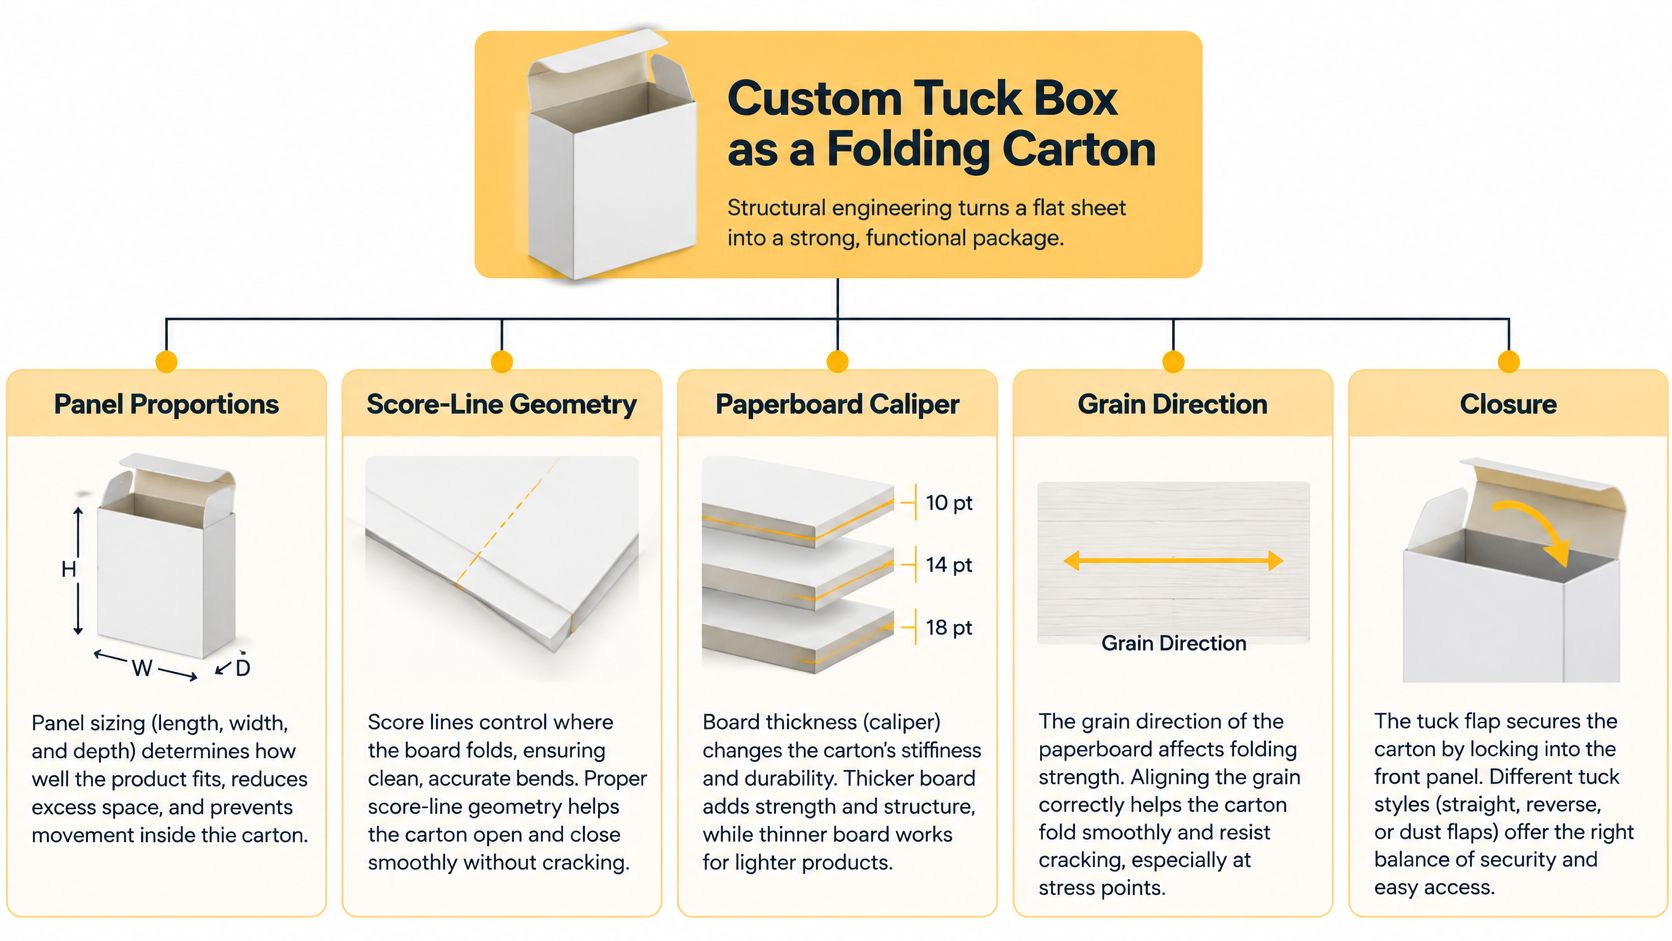
Five levers decide whether it does: panel proportions, score-line geometry, paperboard caliper, grain direction, and closure tolerance. Panel proportions set how much of the product's weight lands on the tuck flap. Score geometry decides whether the flap springs back or stays seated. Caliper and grain direction set stiffness along each axis, and closure tolerance decides how much the flap grips the slot after a few hundred openings.
What a compression test actually measures
Research on folding cartons models top-to-bottom strength from measurable board properties such as bending stiffness and short-span compressive strength. In testing, an erected carton sits between parallel rigid plates and takes load at a controlled deformation rate of 12.5 mm/min under ISO 12048 recommendations, as set out in folding-carton compression research.
The operative word is erected. A flat sheet that feels stiff tells you very little about a box with a crease running through a corner, because scoring and folding are where the failure starts.
Where tuck boxes fail first
- Side-panel buckling: the walls bow outward under stack load and the box loses height, which shows up as a leaning shelf display.
- Crushed scores: the crease compresses beyond recovery, so the flap no longer has a hinge to work against.
- Tuck-flap pop-open: the flap releases inside a shipping carton and the product spills into the void fill.
These happen even when the paperboard has plenty of sheet strength. Stacked inventory, parcel shipment and a retail display load the box in three different directions, so a prototype that survives one test hasn't passed all three.
Structural design has to account for closures, inserts, assembly steps, and how packs sit inside a shipping carton. It also includes reviewing a physical prototype before the final structure is committed to, which is the cheapest point to find that a flap is two millimetres short.
Prototyping several score widths and closure tolerances before tooling keeps those problems from arriving after the die is cut. Here's how a studio works through the structural questions on a real carton.
Board and Surface Materials Compared
Pick the board as if the ink were not there yet. A tuck box is a folded structure first and a printed object second, so the surface that looks best on a flat proof can still be the wrong choice once it is creased, filled, stacked and shipped.
| Option | Strength | Print result | Watch-out |
|---|---|---|---|
| Uncoated paperboard | Natural fold and tactile feel | Softer colour, lower contrast | Absorbs moisture; check Cobb absorptivity |
| Coated folding board | Sharp graphics and good fold quality | Crisp colour in gloss or matte | Coatings can crack along scores |
| Kraft or recycled board | Natural, earthy look | Limited colour range | Visible fibre and colour variation between runs |
| Aqueous-coated board | Scuff protection with water-based coating | Good colour retention | Confirm recyclability of the full construction |
| Film-laminated board | Moisture and scuff resistance | Strong gloss and depth | Film reduces fibre recyclability |
| Barrier-coated board | Protection against humidity | Coating choice drives gloss and ink holdout | Validate against adhesives, storage and recycling |
The properties behind the choice
Mill language can sound abstract, so translate five terms into shop-floor checks. Basis weight tells you how much board is in the sheet. Caliper is thickness, which affects fold tightness and how the box fills out. Bending stiffness predicts whether a panel stays flat or bows. Internal bond is the strength between layers, and Cobb water absorptivity shows how readily the surface takes in moisture.
Internal bond matters where heavy ink coverage, foil, lamination or repeated opening stresses the layers of the board. Cobb absorptivity flags risk from humidity, condensation and water-based coatings. A botanical or supplement brand warehousing in a humid climate should test absorptivity before choosing a soft uncoated surface, because the box that feels premium in the studio can cockle in a Florida summer.
The same enclosure logic appears outside cartons too: advice on long-term storage for original posters puts board, spacing and dry air around the print as part of the protection system.
The spec sheet that prevents arguments
A practical specification states caliper and basis-weight targets, grain orientation, allowable caliper variation, coating or laminate construction, and acceptance criteria for cracking along scores. Write the set down before sampling, or each supplier will pick their own defaults and you will be comparing boxes that are not the same product.
Evaluate the finished box after printing and finishing. Coatings and laminates change folding behaviour and can increase score cracking, so a board that folded cleanly as a blank may fracture once it is laminated. If kraft or recycled board is on your shortlist, the benefits of kraft paper box packaging sets out what that material gives you and where its limits sit.
For supplements, tobacco, beverages or botanicals, an appropriately tested barrier layer can protect both graphics and structural performance. Validate that layer against recyclability, adhesive compatibility and the actual storage environment before selecting it for appearance, because a box that protects the product but fails the recycling test has moved the problem downstream.
Artwork, Finishes and Recyclability Trade-Offs
A finish changes what the box is physically made of, and that decides what happens to it after the customer is done with it. Treat finishing as a materials decision that belongs early in the project, not as decoration applied once the artwork is approved.
Getting artwork onto the dieline
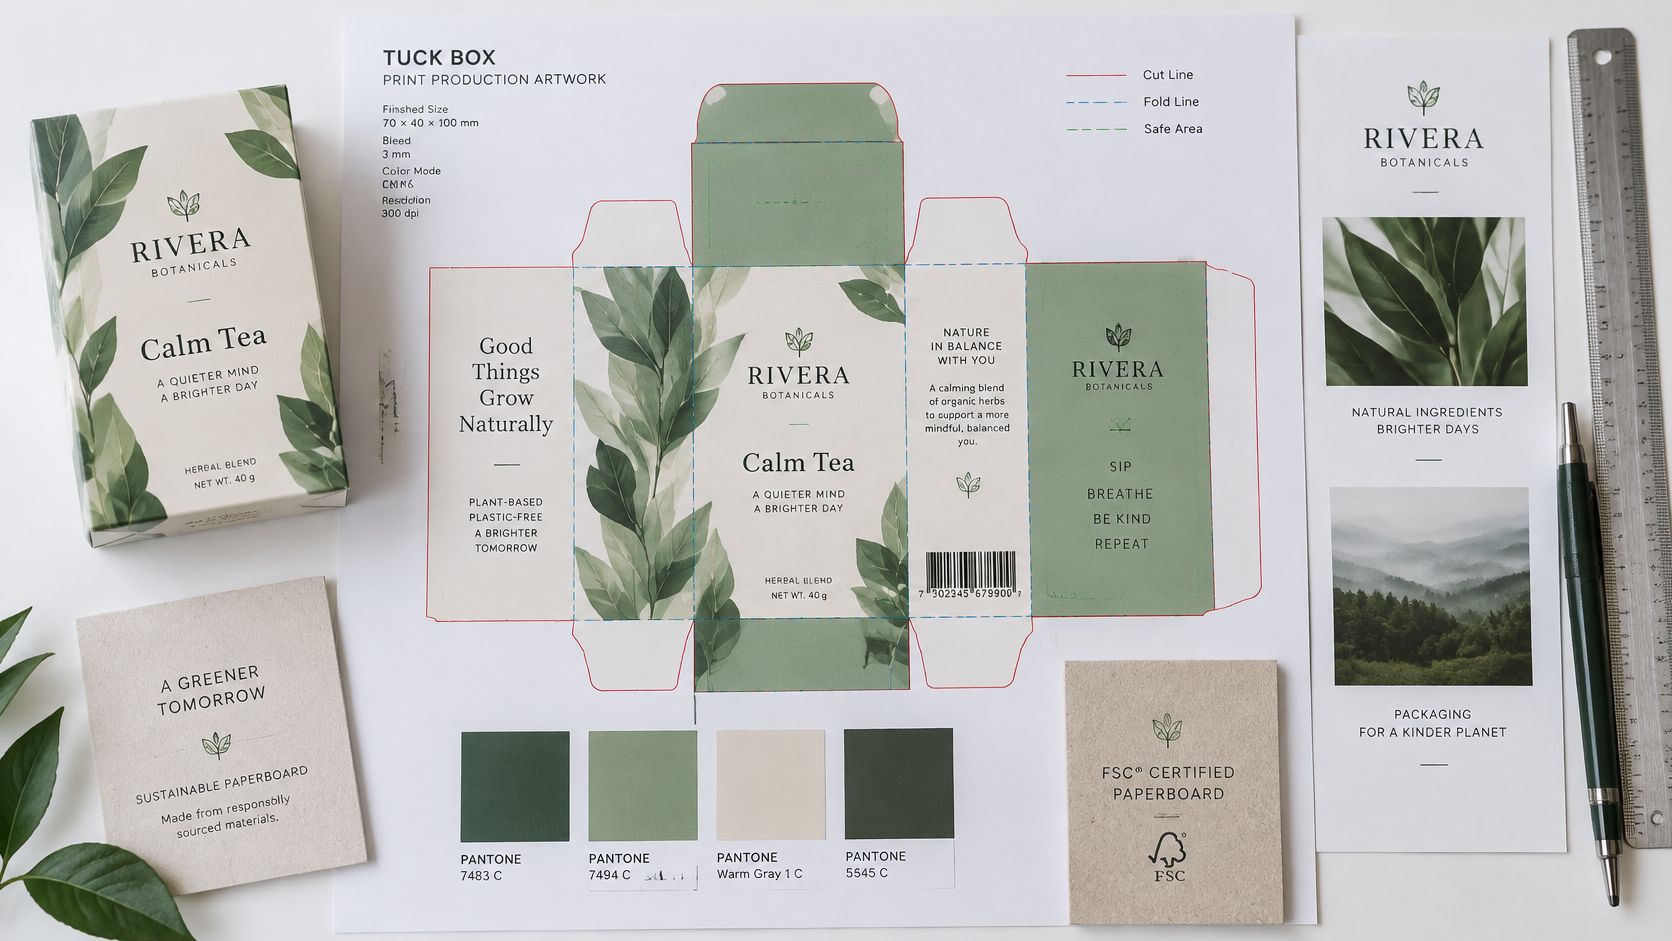
Artwork is placed on the approved dieline, with folds, cuts and safe areas checked before print, so nothing important lands on a crease or a glue tab. Existing artwork can be adapted to packaging when its resolution, format and composition suit the print process. A logo pulled from a web page at screen resolution won't hold up at carton scale, and artwork composed for a square social post rarely survives being split across a front panel, a spine and a tuck flap.
Sequence the decisions in a fixed order: stock first, finish second, artwork placement third. Foil stamping, debossing and embossing need the right board surface to register cleanly, so the stock decision has to come before the finish decision. Then keep readability ahead of decoration. Readable information, distinct variant names and consistent presentation make the package easier to understand, and decorative finishes shouldn't obscure quantity, identity or other approved information. A foil flourish over the net weight is a compliance problem dressed as a design choice.
Treat the whole box as one end-of-life system
Paperboard, coatings, foil, windows, adhesives and inks are usually chosen as separate aesthetic questions. At the sorting facility they are one object. Current EPR guidance identifies laminate films, foil, plastic windows and non-washable adhesives or inks as recyclability detractors for fibre packaging, with eco-modulated fees potentially turning those choices into recurring costs rather than one-time production expenses, as Arkay's EPR packaging guidance sets out. Recyclability rules across major markets are moving in the same direction, so a construction that ships acceptably today can meet a stricter standard by the time you reorder.
Compare your options on four axes instead of one: appearance, durability, recyclability and likely compliance impact.
- Aqueous coating keeps the fibre stream intact while adding scuff protection from a water-based layer.
- Film lamination gives deeper gloss and real moisture resistance, and takes the box off the easy fibre path.
- Foil and spot UV lift a premium SKU and complicate that same path.
- A window shows the product and adds a material the local system probably cannot separate.
The uncomfortable part: a box can be mostly paper and still count as mixed-material waste when its layers cannot be separated.
Two questions decide whether a recyclable claim holds. Can the local recycling system process the finished construction, rather than only the bare board? And does removing a window or a laminate change your EPR reporting or fee band? Document the fibre and coating composition while the dieline is still editable, because a finishing decision made for appearance can create a compliance consequence before manufacturing begins. The same discipline of testing a process against its material footprint applies in other manufacturing fields, and American Additive Manufacturing on green printing runs an equivalent test on additive manufacturing.
If the brief leans premium, high-end packaging boxes covers how finishes are usually balanced against cost and presentation.
Print Methods, Order Quantities and Cost Drivers
Three production routes plus a short-run hybrid cover most tuck box work.
| Print method | Typical minimum | Cost profile | Best use |
|---|---|---|---|
| Digital folding carton | About 500 units | Higher per-unit cost, no large plate charge | Launches, SKU testing, staged reorders |
| Offset printing | About 1,000 to 2,500 units; cost-effective from about 5,000 to 10,000 | Plate cost of $200 to $600 per colour | Large, stable runs with fixed formulas |
| Foil, deboss or emboss add-on | No separate minimum; quoted as an add-on to the base run | Setup and tooling charges added to the run | Premium retail finish on a confirmed design |
| Short-run hybrid | About 500 units, the same floor as digital | Digital print on a standard die keeps setup low | Limited editions and seasonal variants |
Why the cheapest unit price is often the wrong target
The economics are documented and reasonably clear. The digital folding-carton market analysis puts traditional offset at its most cost-effective from roughly 5,000 to 10,000 units, while digital folding-carton production supports approximately 500 to 2,000 units without significant price premiums. The same analysis places digital minimums around 500 units, offset minimums around 1,000 to 2,500 units, and offset plate costs at $200 to $600 per colour.
Those numbers describe a market worth defending. Industry research estimated global folding-carton consumption exceeded 50 million metric tonnes in 2024, at an estimated market value of approximately $180 billion, with volume up almost 5% on 2023, per Smithers' folding-carton market outlook.
Now the part the price sheet leaves out. A large offset run cuts the per-box cost and raises the cost of being wrong. Formulas change, compliance panels get rewritten, a claim gets adjusted, a brand architecture shifts, and suddenly 8,000 boxes say something the brand no longer says. Digital costs more per unit and buys you staged purchasing, channel-specific artwork, variable batch information and faster SKU testing.
Cost rule: compare total cost of ownership, not unit price. The cheapest box is the one you don't have to reprint.
Run the break-even properly. Include plate or tooling charges, freight, storage, spoilage, expected sell-through, and the cost of revising the packaging if something on the panel changes. Say a gummy brand forecasts 6,000 units but expects a flavour line-up change within nine months: an offset run at the low unit price may still lose to a digital run bought in two tranches, once obsolete stock and a reprint are priced in.
Then settle the SKU question. One standardized footprint across several products saves tooling, simplifies packing lines and keeps the range visually coherent. A separate structure is justified when product dimensions differ enough that a shared box rattles, crushes or needs excessive void fill.
Confirm Your Brief Before Requesting Quotes
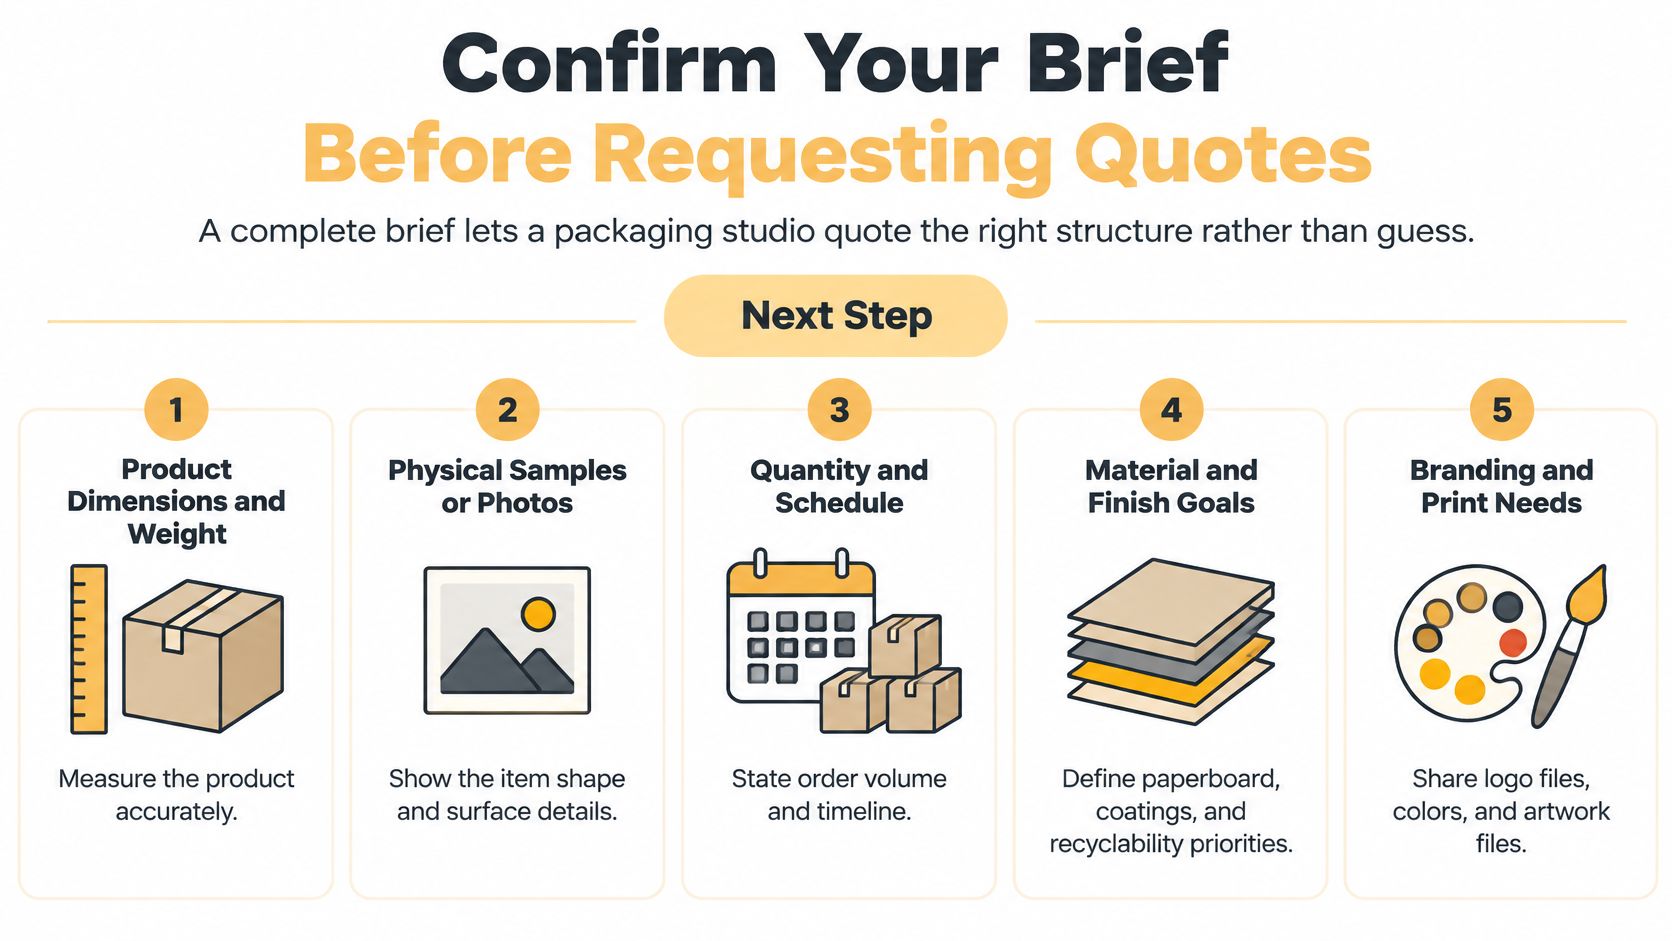
A quote is only as accurate as the brief behind it. Give a structural engineer seven pieces of information, in this order, and the price that comes back describes the box you need rather than the box someone assumed you wanted.
- Product dimensions and weight. Measure the actual unit, not the spec sheet, and measure it filled.
- Physical samples or clear photos. Customers provide product measurements, weight and samples where available, because a photo tells a structural engineer more about shape and surface than a dimension list alone.
- Closures, inserts and assembly steps. Say whether the box ships flat or assembled, who fills it, and whether a leaflet, sachet or tray goes inside.
- Launch quantity and a reorder plan. First run plus expected reorder cadence decides the print route.
- Who supplies artwork and in what format. Vector dieline-ready files behave differently from a flattened PDF, and that difference shows up as a charge or a delay.
- Compliance panels and claims. List everything the regulator or the retailer requires on the pack, and where it has to sit.
- Approval steps and the prototype test plan. Who signs off the dieline, who signs off the proof, and what the physical prototype has to prove.
Why each item changes the quote
Dimensions decide whether a standard tooling size works or a new die is needed. Weight decides caliper, and caliper decides board price. Samples shorten the structural conversation considerably, because an engineer can hold the product, check the tuck fit and measure the clearance around it rather than estimate from numbers alone. Quantity moves the job between digital and offset, which changes both unit price and setup. Artwork responsibility determines whether the studio builds the file or checks someone else's. Compliance panels decide how much of the printable area is already spoken for, and that can push a layout from one panel to two.
Each item answers a question the engineer would otherwise have to guess at. Guesses get priced in.
A precise brief covering dimensions, components, quantities, artwork responsibilities and approval steps is part of what makes a packaging project credible. Once the dieline is approved, the prototype becomes the true test: build one representative assembled proof before extending the system to other SKUs, then check the smaller container, the longer ingredient statement and the different physical formats against it. A box that works for a 30-count bottle doesn't automatically work for a 60-count.
The packaging design process behind that proof is worth understanding before you request numbers from anyone: artwork gets placed on the approved dieline, and folds, cuts and safe areas are checked before the structure is committed. If you'd rather hand the whole sequence to a team that runs structural design, artwork and production under one roof, our studio is glad to talk through your packaging brief with you.
A custom tuck box only performs when the structure, board, finish and run size are settled in that order, and that's the work Mylarmen does before anything goes to press. The studio handles structural design, die-lines, 3D mockups, physical prototypes, compliance panels and print production for supplement, cannabis, kratom, peptide, tobacco and beverage brands, with concept to delivered stock under one roof. If you're specifying a tuck box and want a brief that survives tooling, visit Mylarmen and tell us what you're packing.