

A 12-count pouch sits on your desk next to two competitor packs a buyer mailed over. The printer wants a purchase order, the retailer wants a compliance answer you don't have yet, and the launch date is eight weeks out.
That's the moment packaging design stops being a graphics exercise. A pack has to sell in three seconds, survive a parcel network, satisfy a compliance reviewer and run on a filling line that was bought before you were hired. Miss any one of those and the shelf presence you paid for doesn't matter, because the product either never lists or arrives crushed.
Nobody asking how to packaging design a product wants a moodboard at that point. They want a sequence, the decisions inside each step, and the tests that stop a bad decision from reaching tooling. What follows is that sequence, written the way I'd walk a founder through it across a table, including the places projects usually break.
Table of Contents
- How to Packaging Design in Six Steps
- Write a Packaging Brief That Covers Product and Brand
- Design the Structure and Choose Materials
- Create the Visual System and Compliance Panels
- Prototype and Test Before Committing to Production
- Move From Approved Artwork to Production
- Fix Common Packaging Problems and Plan Your Launch
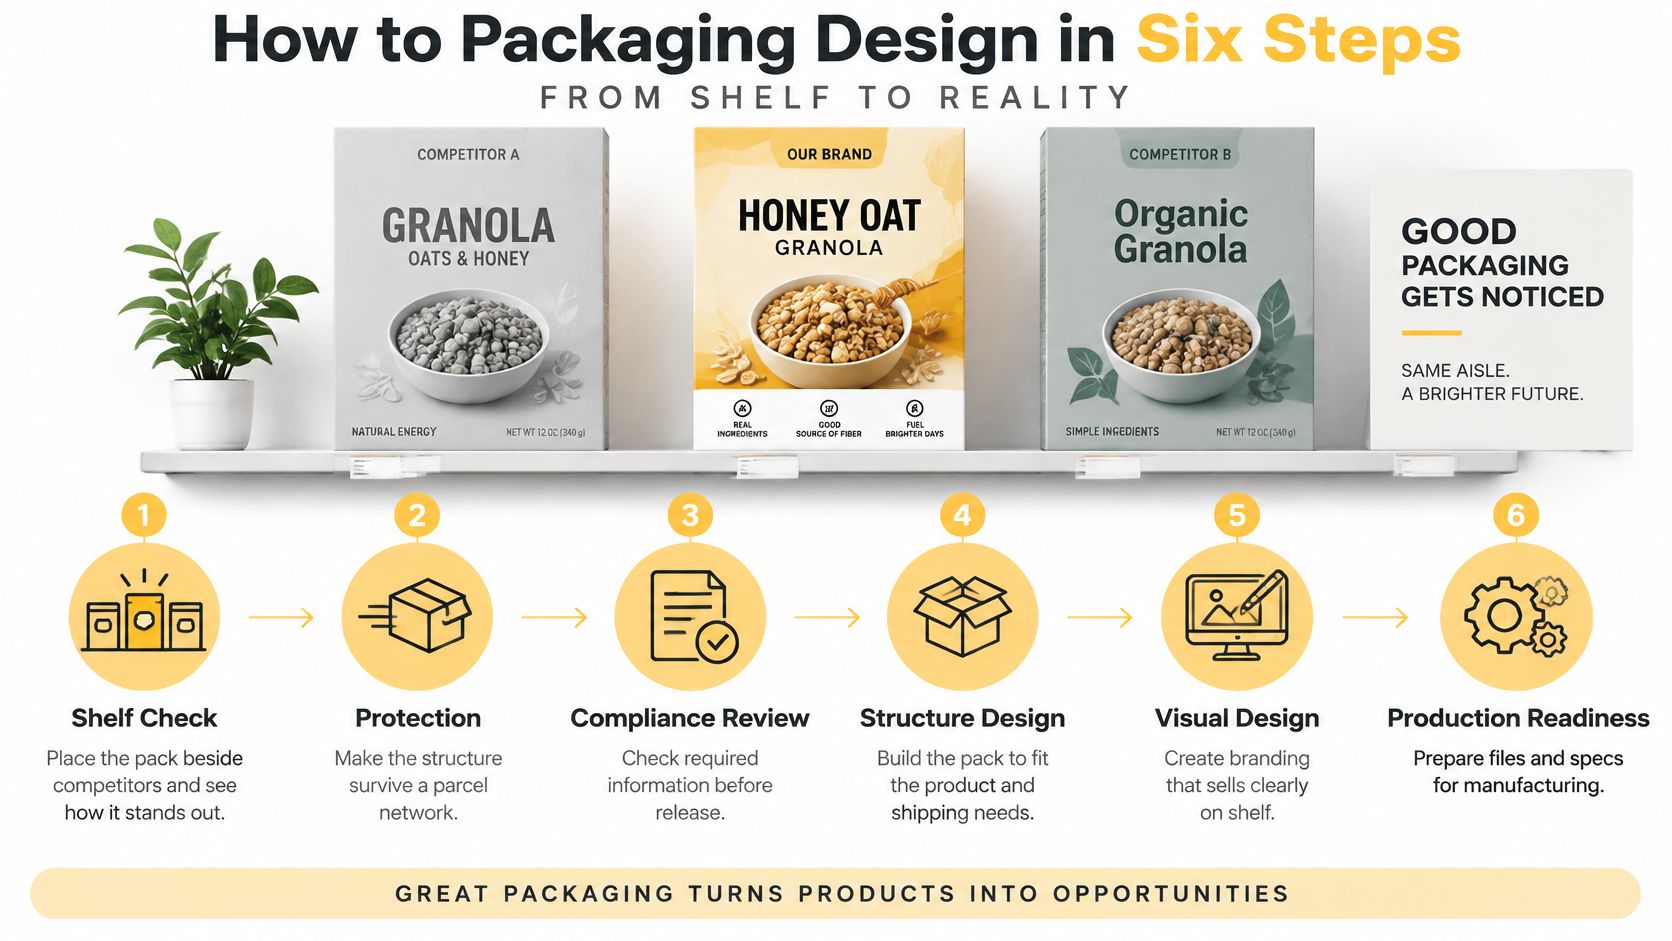
How to Packaging Design in Six Steps
Packaging fails more often in the handoffs than in the sketch. Structure gets agreed before anyone checks the shipper, artwork gets finished before the warning panel is measured, and a prototype looks right until vibration loosens the closure.
Treat the work as six phases. Each one produces an input the next phase consumes, which is why jumping to decoration usually means paying for the same decision twice.
- Write the brief. Product dimensions, filled weight, fragility, shelf life, filling method, sales channel and brand direction. One page. If a fact would change the die-line, it goes on page one, not in a follow-up email.
- Design the structure and choose materials. Form factor, seal, closure, inserts, tolerance and barrier performance, plus how the empty pack separates, stores and enters disposal. The pack stops being an idea and starts being a drawing with millimetres on it.
- Build the visual system. Identity, information hierarchy, variant architecture and compliance panels, arranged so a shopper can read the pack without instructions and a reviewer can find approved information fast.
- Prototype and test. Renderings, printed proofs, then drop, vibration and compression testing on production-representative samples. Cosmetic models tell you nothing about transit.
- Prepare production. Die-lines, print method, finishes, colour proofs and a press check on the actual substrate.
- Launch and iterate. Quality control on delivered stock, fulfilment, then retailer and customer feedback that feeds the next SKU.
Here's the map in one view.
The calendar usually breaks on verification, not drawing. A failed drop test sends you back one phase. A rejected compliance panel sends you back two. Material lead times and press queues do the rest.
The machine layer is easy to forget. Codes, quiet zones, seam tolerances and barcode contrast decide whether the pack moves through checkout, fulfilment and returns without friction. A pack that scans badly stops a line, and that is a conversation no brand wants with a buyer.
Keep the six steps pinned above the desk. When a choice is argued as taste, ask which test, tolerance, regulation or disposal route it changes.
Write a Packaging Brief That Covers Product and Brand
Most packaging projects that go sideways went sideways at the start. Not in the concept review, not at the press check. When no one stated what the product weighs when it's full.
Build the brief in five moves.
- Document the product facts. Exact dimensions, filled weight, fragility, shelf-life requirement, closure performance and filling method. Measure a filled unit, not an empty one. A pouch that bulges 6 mm once it holds 250 g changes the carton that holds it, and you want that number before the die-line exists.
- Map the route to market. Retail shelf, ecommerce parcel, dispensary counter or subscription box, plus pallet configuration and the shipping carton the unit has to survive. A pack designed for a shelf display and shipped as a parcel has two different lives.
- Set the brand direction. Positioning, audience, tone, two or three reference packs and the full SKU list, including the longest variant name and the smallest format. Those two extremes break more layouts than any other input.
- List the compliance needs. Warnings, net quantity, ingredient or nutrition panels, a GS1 barcode with clear quiet zones and, for regulated categories, tamper evidence. Different markets and categories have different rules, so name the markets now.
- Assign ownership. Who produces artwork, who approves it, who signs the press proof, how many units at launch and what the budget cap is. An approval chain with two names in it is faster than one with six.
Say a gummy brand is launching. Ten gummies per sleeve, filled on a rotary machine, is a different structure from 60 gummies in a jar filled by weight. The count and the filling equipment decide pouch versus jar long before anyone debates colour, and that's the whole argument for facts-first briefing.
The test I apply: if a line in the brief can't be measured, quoted or tested, it isn't a requirement yet. It's a preference.
| Brief item | Why it matters | Example |
|---|---|---|
| Product dimensions and weight | Drives structure, carton fit and shipping cost | 120 × 60 × 18 mm carton, 240 g filled |
| Pack quantity and filling method | Decides pouch, jar or carton before visuals start | 10 gummies per sleeve, filled on a rotary machine |
| Distribution channel | Sets protection, display and compliance expectations | Ecommerce only, parcel network, 1 m drops |
| Shelf life and barrier needs | Chooses film, coating or container | 12-month coffee, high-barrier pouch with valve |
| Variant and SKU list | Prevents redesigns when the range grows | 12 SKUs, longest name 34 characters |
| Compliance requirements | Reserves space for warnings, quantity and barcode | GS1 barcode, per-serving panel, tamper strip |
| Quantities and budget | Chooses digital short run versus flexographic volume | 5,000 units at launch, digital print, fixed budget cap |
| Approval steps | Defines who signs off concept, artwork and press proofs | Founder approves design, QA approves compliance |
A precise brief is also what lets a studio or a supplier quote rather than guess. Vague inputs get padded into the estimate. Settle the difference between positioning and the visual mark early, since brand versus identity shapes how much of the pack carries the master brand and how much carries the product name.
Design the Structure and Choose Materials
Structure is where packaging design becomes engineering. Four decisions, in order.
- Pick the form factor. Pouch, folding carton, rigid box, tube, tin or labelled bottle. Choose by fragility, channel and shelf presence, not by what the moodboard likes. A rigid box on a crowded value shelf reads as expensive in the wrong way.
- Engineer closures, seals and inserts. Child resistance where the category is regulated, reclosability where the product is used in portions, and how the units nest in a shipper. Closures, inserts and assembly steps are structural work, and they decide whether the pack can be filled at line speed.
- Draw to production tolerances. A die-line drawn at nominal size won't match what the converter produces. Build in the tolerance they quote, so the artwork and the manufactured pack agree about where the fold lands.
- Select materials for barrier, print surface and end of life. Moisture, oxygen and light resistance first, then how the surface takes ink and finish, then what happens after use.
The priority order isn't a matter of taste. A U.S. survey of 400 consumers, published in RRD's 2026 sustainable packaging consumer report, ranked shelf-life retention at 76%, product protection at 73%, ease of opening at 55% and reclosability at 39%, while only 20% prioritized planet-friendly attributes. Read those as design weights: protect first, then make it easy to open, then make it sustainable in a way you can defend.
The global picture agrees. Research across more than 11,000 consumers in 11 countries found food safety and shelf life remain the packaging characteristics that most influence purchase decisions, with only 39% ranking environmental impact as extremely or very important, per McKinsey's 2025 packaging survey. Barrier layers, tamper evidence and moisture protection earn their complexity when they protect the product. That's the trade-off to explain, plainly, instead of hiding it behind a leaf icon.
| Format or material | Best for | Barrier performance | Relative cost | End of life |
|---|---|---|---|---|
| Folding carton (paperboard) | Retail shelves and secondary packaging | Low to moderate | Low | Widely recyclable |
| Corrugated shipper | Ecommerce and transport protection | High stacking and vibration resistance | Low | Widely recyclable |
| Mono-material pouch | Snacks, supplements and refills | Moderate | Medium | Recyclable where facilities exist |
| Foil-laminate pouch | Coffee, cannabis and long shelf life | High | Medium | Hard to recycle, check local programs |
| PET or HDPE bottle | Beverages, liquids and gummies | Moderate | Low to medium | Widely recycled, check resin code |
| Glass jar or bottle | Premium products, infusions and concentrates | High barrier but fragile | High | Widely recyclable, heavier to ship |
| Metal tin | Tobacco, mints and limited editions | High | High | Widely recyclable |
Take the foil-laminate row. It buys you a year of coffee shelf life because the aluminium layer blocks oxygen and moisture, and it costs you an end-of-life story, because most kerbside programs can't separate the layers. That's a fair trade for a roaster shipping nationally and a bad one for a brand whose entire pitch is low-waste refills.
The classic mistake in this phase is thinning the material to hit a cost target without rerunning distribution testing. It looks fine on the quote and shows up three weeks later as split seams on the bottom layer of a pallet. Send us product measurements, weight and a sample where you have one, because structural design covers form factor, seal, closure and tolerance, and none of those can be drawn from a photo. If you're still deciding between formats, this comparison of packaging material types narrows the shortlist before you commit.
Create the Visual System and Compliance Panels
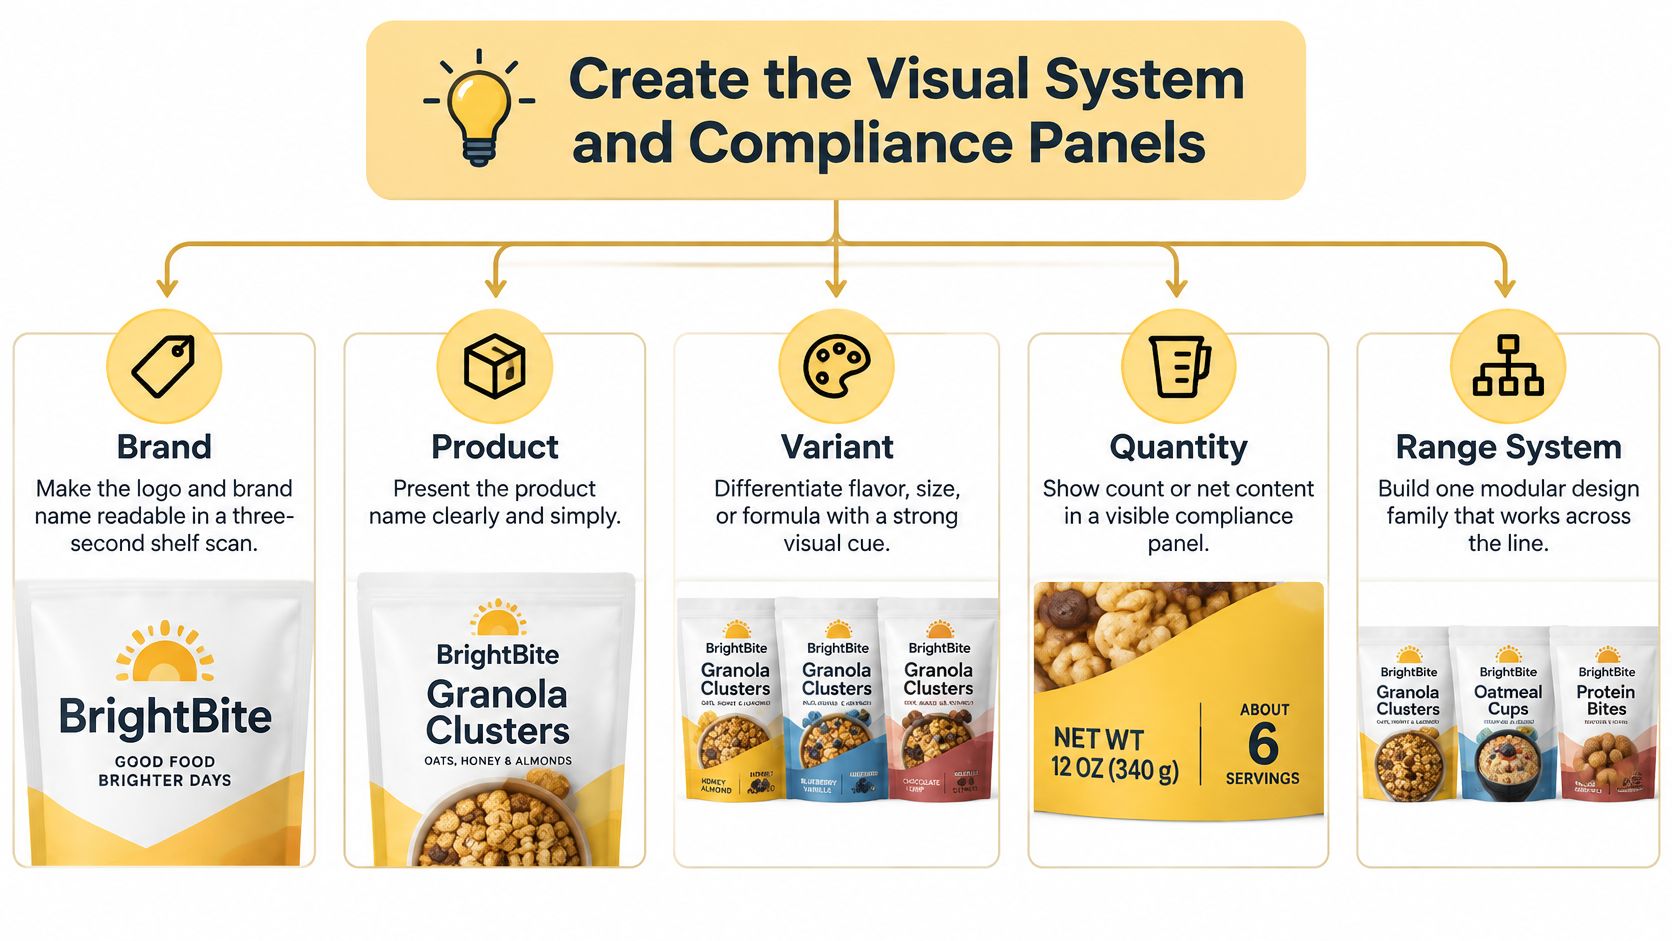
A shopper gives you about three seconds. The pack has to answer four questions in that window: what is it, whose is it, which variant, and how much. Everything else is secondary and belongs on a side or back panel.
Set the hierarchy first, then design the range rather than a single hero pack. Build one representative assembled proof, check it against the smallest container and the longest variant statement, and only then extend the system. Range systems fail at the extremes, never in the middle.
Reserve compliance panels before the first concept, not after approval. Warnings, net quantity, barcode quiet zones and tamper evidence are fixed rectangles you design around, and decorative finishes like foil, spot UV or soft-touch laminate should never sit over required text. Readable information, distinct variant names and consistent presentation are what make a pack navigable, and a finish that obscures quantity or identity is a defect, not a flourish.
Print-ready artwork has its own rules: vector logos, 300 dpi imagery at final size, CMYK with Pantone references for brand colours, die-lines on a separate layer with bleed, and written finish specs. If you're unsure how much bleed and safe margin to build in, this walkthrough on how to set bleed and margins covers the file setup that prevents white slivers on trimmed edges.
The evidence says to test more than shelf pop. A global Ipsos survey cited in a 2025 systematic review found 72% of consumers considered product packaging design important to their purchasing decisions. In a 2024 orange-juice experiment reported in the same review, nutritional information drew the greatest visual attention at 0.40 fixation counts, while a New Zealand-made logo produced an odds ratio of 15.62 for purchase intention. The pack that won the most attention wasn't the pack participants liked most.
That gap is the reason to test comprehension, trust and preference separately. A loud colour might win the glance and lose the sale.
Add a disposal layer to the artwork
Recyclability is a material decision. Correct disposal is a design decision, and most packs skip it. Consumer research published by RRD on sustainable packaging found 40% of surveyed consumers are unsure whether an entire package is recyclable or whether components must be separated, and 76% report greater satisfaction when packaging can be crushed, folded or flattened to reduce waste volume.
Three practical moves follow. Print disassembly cues wherever a pack has more than one component, so the sleeve, the tray and the film are each identified. Design the form to flatten, which usually means a crush-friendly carton board and a tear strip that doesn't fight the consumer. Then adapt the symbols and wording per market, because collection rules aren't universal and a symbol that's wrong in one country is worse than no symbol.
If the system also runs across bottles or jars, the hierarchy rules carry over to product label design, including where the variant block sits and how much space compliance copy needs.
Prototype and Test Before Committing to Production
Validation is a gate, not a stage you squeeze in at the end. Here's the workspace where that judgement gets made, flat proofs and renders side by side.
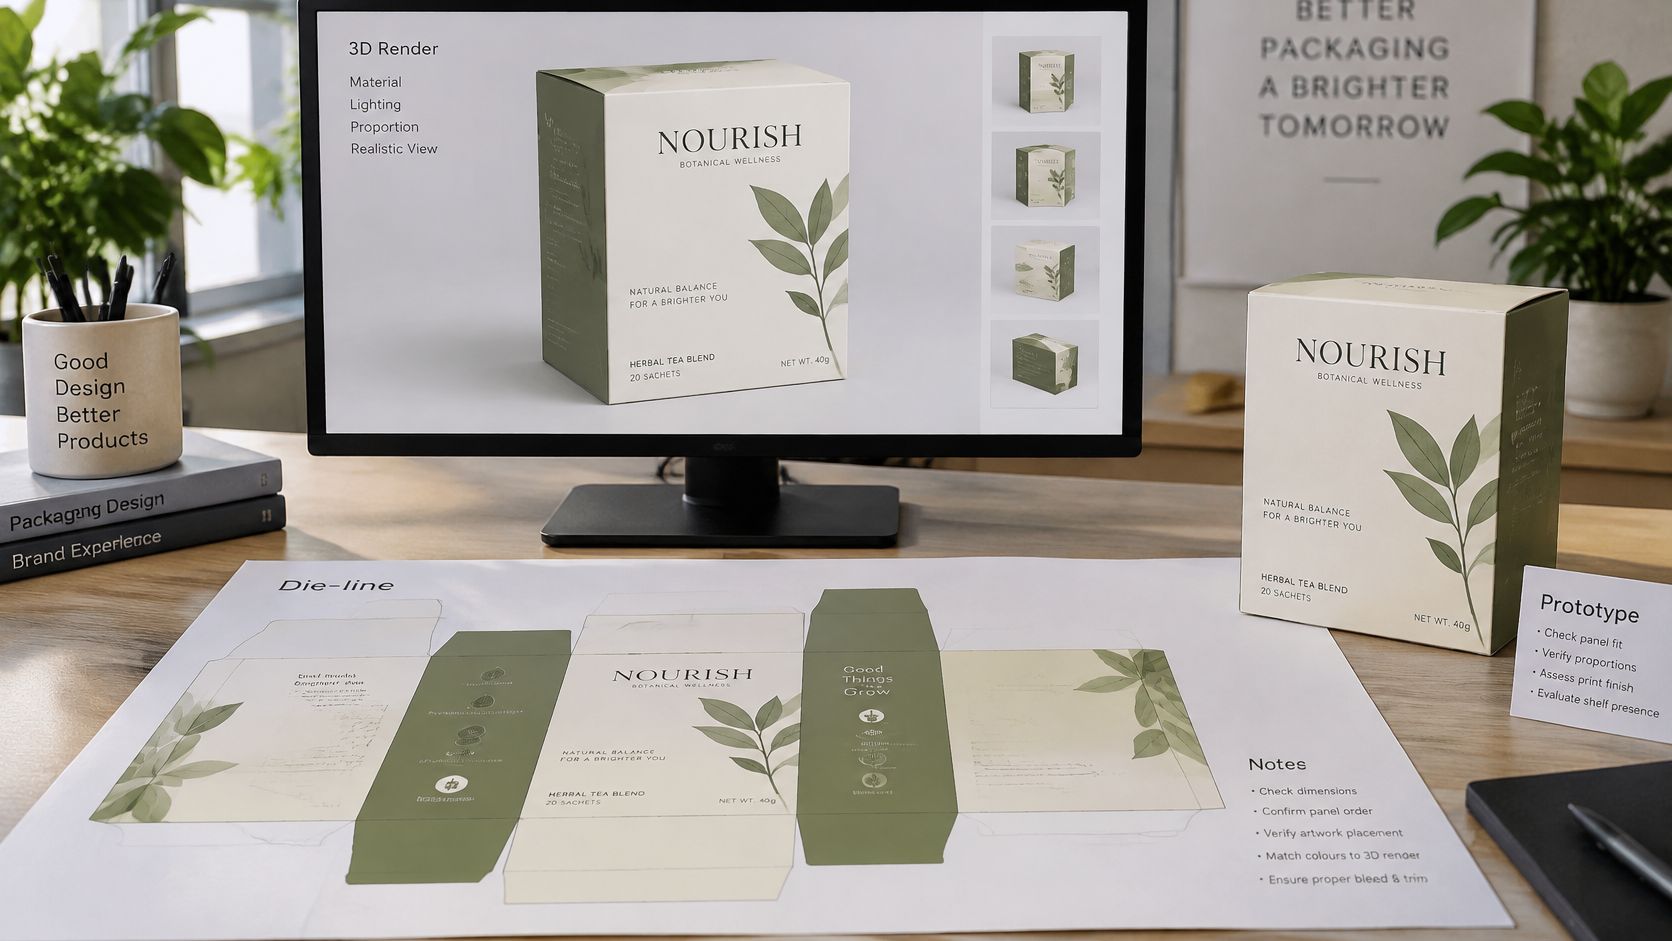
Five steps, run in order.
- Review the flat and the render. Check proportion, panel fit and shelf presence on a 2D die-line and a photorealistic 3D render before anything is printed. Renders are cheap; corrections after tooling are not.
- Build physical prototypes. Large-format prints wrapped on blanks and 3D-printed structural models. Open it, pour from it, stack four of them and drop the shipper. A physical prototype is the checkpoint before the final structure is committed.
- Test production-representative samples. Condition them for temperature and humidity where relevant, then run compression or stacking (ASTM D4577), free-fall drop (ASTM D5276), vibration (ASTM D999) or the full distribution sequence (ASTM D4169), as listed in ASTM's packaging standards catalogue.
- Record the failure, change one variable. Note failure mode, location, load, orientation and functional impact, then adjust the weakest item: board grade, cushioning, seal geometry or closure retention. Retest after each major change so you know what fixed it.
- Run a shopper test. Five to ten people, no coaching. Ask them to find the variant, the quantity and the opening instruction. If two of them turn the pack over twice, the hierarchy needs work.
The trap with ASTM methods: most describe how to run a test, not whether the result passes. Drop height, orientation, number of drops, conditioning and acceptance limits come from your distribution profile, an ISTA protocol, a regulation or a written product specification. A supplier who says "it meets ASTM" hasn't told you anything yet.
That's why the test plan gets written before tooling is cut, with pass criteria on paper. It's also why packaging projects get detailed specifications and 3D mockups before production rather than after a first run fails.
Move From Approved Artwork to Production
Approved artwork is a milestone. Delivered stock is the finish line, and the gap between them is where colour drifts and barcodes stop scanning.
- Choose the print method against volume. Digital for launch quantities and versioning, flexographic for mid and high volume, rotogravure for very long runs. Plan the switch while you plan the launch: 5,000 digital units now, plates and a flexo run at 50,000, with the artwork built so nothing has to be redrawn for the transition.
- Specify finishes explicitly. Foil, deboss, emboss, matte or soft-touch laminate, each with a named location on the die-line. Confirm in writing that none of them lands on required copy.
- Approve colour on the actual substrate. Pantone drawdowns first, then a press check on the actual board or film. Keep brand colours locked to a reference so the printer has something to verify against, and scan a finished pack with a handheld reader to confirm the barcode reads at retail contrast and quiet-zone widths.
- Run quality control on the run. Seal integrity on a sample per batch, print registration, fill weights and carton erection. Catch the drift at 2,000 units, not at the retailer's distribution centre.
- Arrange fulfilment. Printed packaging gets packed and shipped where you need it, which often means holding stock at a co-packer rather than a warehouse two time zones away.
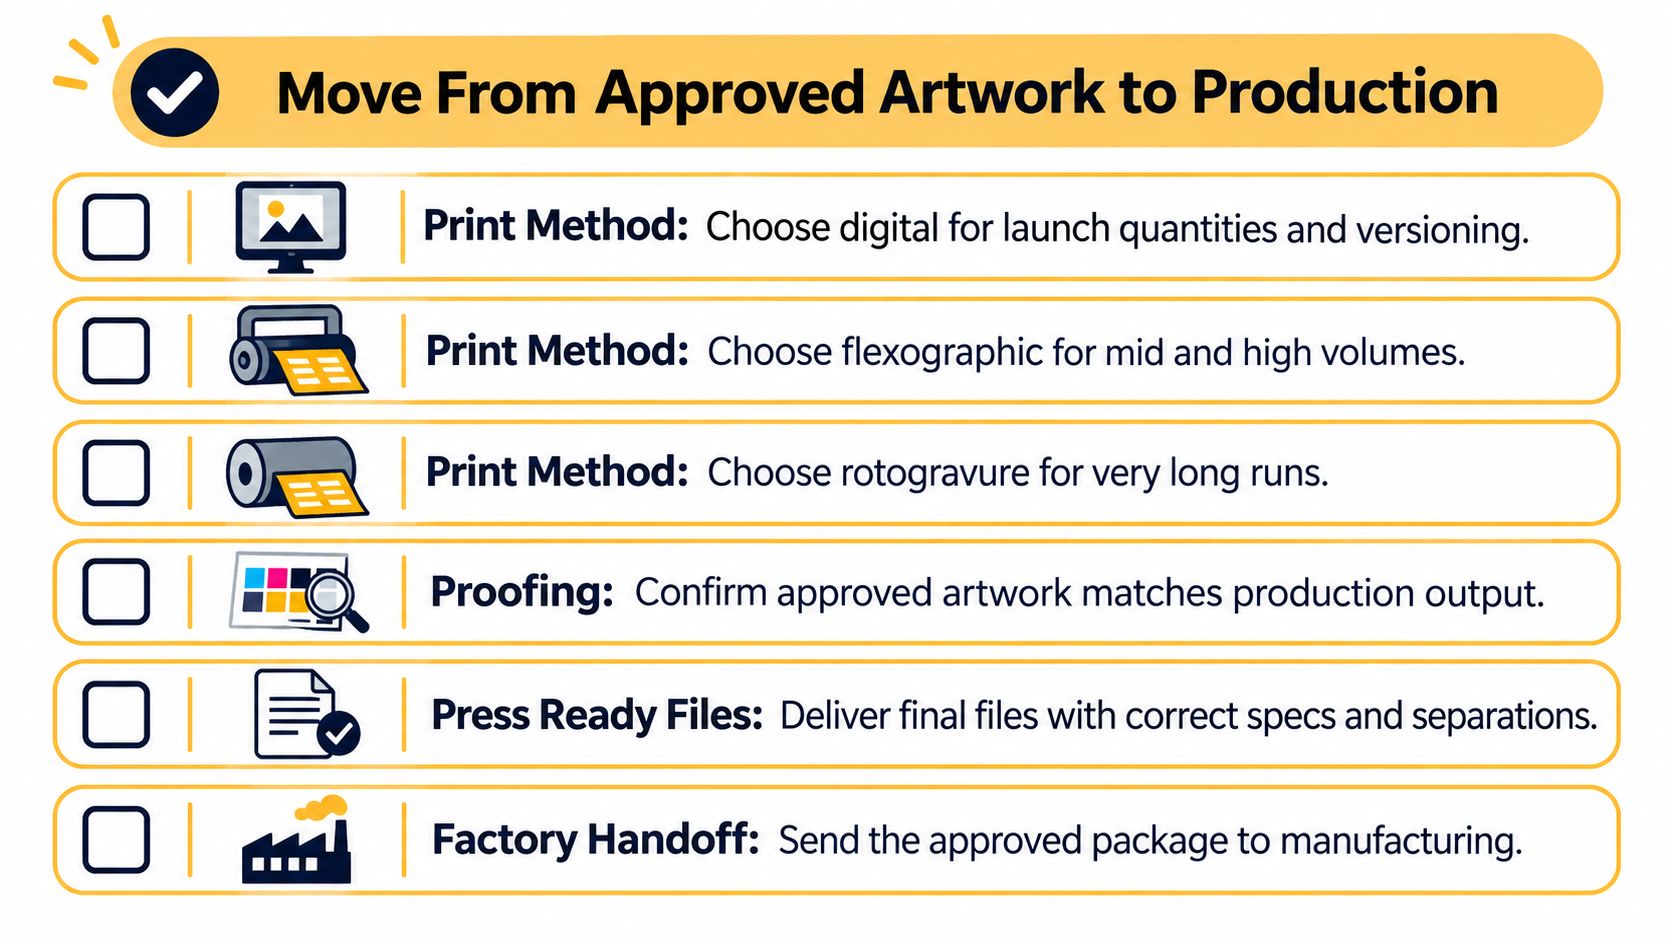
Materials are moving faster than most briefs assume. Approximately 880 million plastic packages were replaced with paperboard alternatives in 2025, according to Graphic Packaging's 2025 Impact Report. Before you default to a plastic tray or a laminated blister, ask your converter which paperboard structures have replaced that format in the past two years. The answer is often a construction you can run on existing equipment.
Fix Common Packaging Problems and Plan Your Launch
Most launch failures have a known cause and a fix that belongs in an earlier phase. Diagnose before you reprint, because a second run with the same files buys you the same result at full price.
| Problem | Likely cause | Fix |
|---|---|---|
| Blurry or muddy print | Low-resolution or RGB artwork | Rebuild files at 300 dpi, vectorize logos, proof on press |
| Pouch seams split in transit | Seal geometry or film gauge never distribution tested | Retest to ASTM D5276, widen seals or upgrade film |
| Shoppers miss the variant | Weak information hierarchy | Move the variant name to the top third and test with 5-10 shoppers |
| Compliance panel rejected | Decorative finish obscures required text | Reserve panel space in the brief and run a separate compliance review |
| Cartons arrive crushed | Board grade underspecified for stacking height | Compression-test to ASTM D4577 and upgrade flute or board |
| Colour drifts from the proof | No colour management across substrates | Approve Pantone drawdowns and attend a press check |
Read the right-hand column backwards and you get the phase that prevents each one: the print fix returns to file preparation, the seam fix to the drop test, the hierarchy fix to the shopper test, the crushing fix to compression testing. Almost nothing on that list is a design taste problem. Material upgrades deserve the same scrutiny. A film or board that survives transit but cannot be recovered or recycled in the market it ships to trades one failure for another, so the end-of-life route belongs in the same conversation as the structure.
Then the practical decision. Stock containers with a simple label are a candidate for handling in-house, especially at small volumes where the wrap and the label are the whole pack. Custom structures, printed cartons and regulated categories such as supplements, cannabis, beverages or tobacco usually need the brief, the structural engineering and the production run managed together, which is what Mylarmen does as a studio covering branding, packaging design and production.
Bring your completed brief to that first conversation; a moodboard alone says nothing about dimensions, an agreed variant list or a confirmed compliance category, and inputs like those are what shape a scope. A useful proposal states what is included and names the inputs still unresolved, so you know exactly what is needed before the work starts.
Packaging works as one connected system, and the brands that launch cleanly treat the brief, the structure, the test plan and the print check as a single process. Mylarmen builds that process under one roof, combining brand development, structural engineering, artwork, compliance panels and production management for cannabis, kratom, peptide, supplement, tobacco and beverage brands. If you have a product heading to shelf or a range that keeps breaking at the same phase, bring the brief to Mylarmen and scope the project from the facts up.