

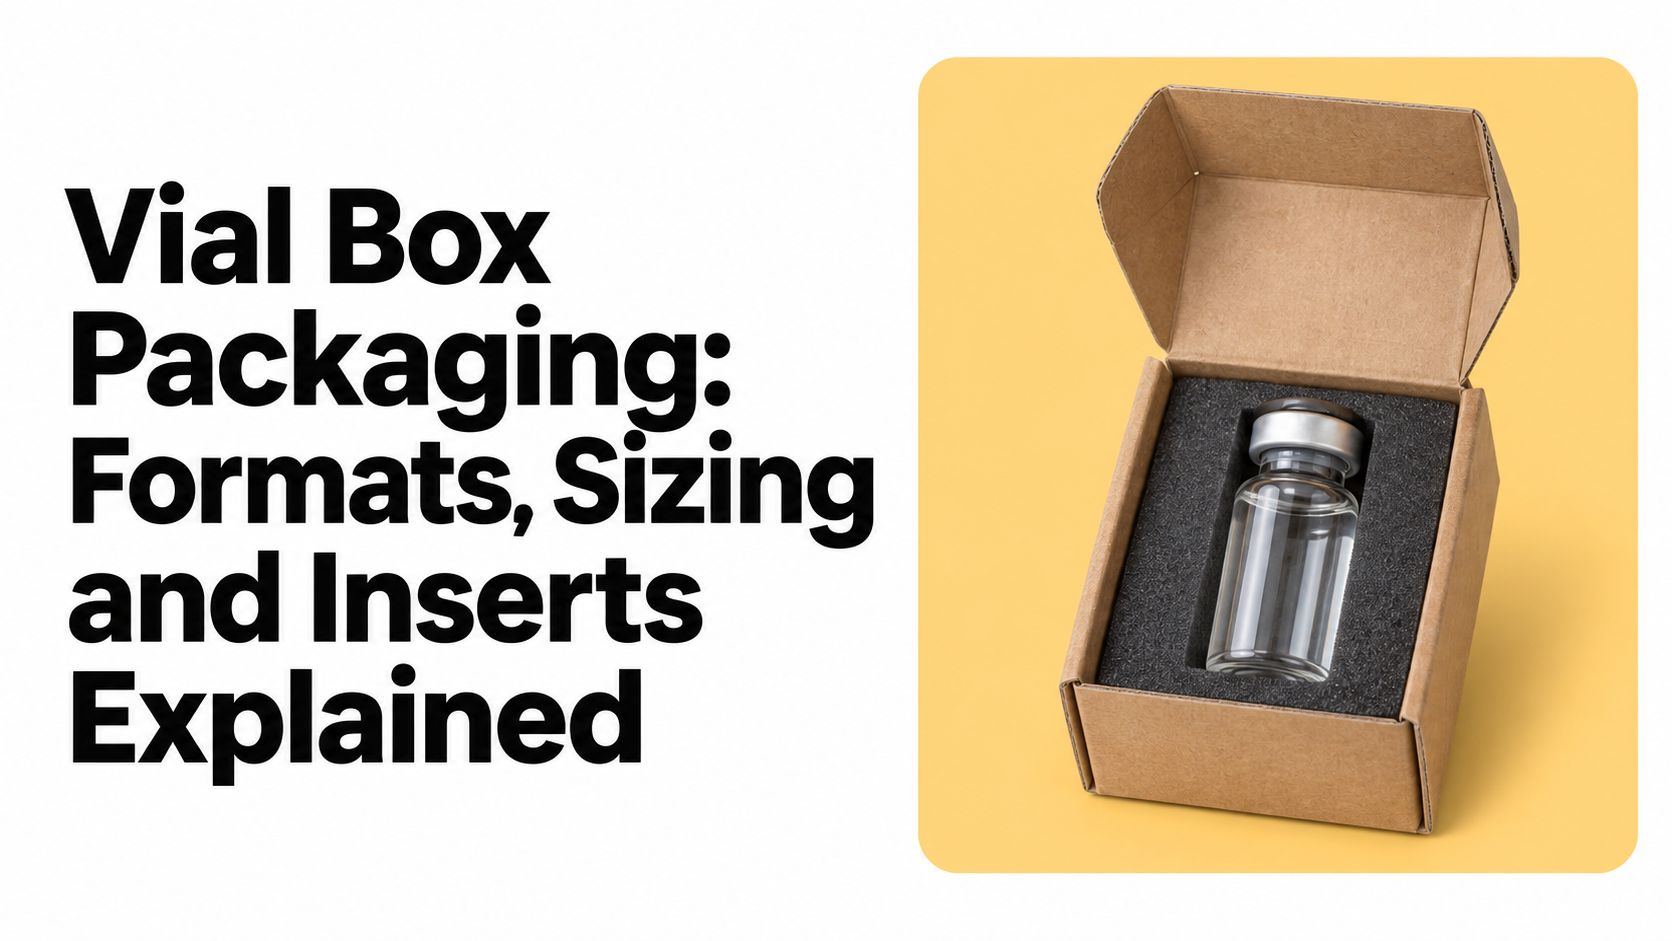
You've got a vial on the bench, or two of them, a 3 ml and a 10 ml, and a decision about what goes around them. Last time the vials shipped in a bubble mailer, or in a plain carton with nothing inside but air, and at least one arrived with a chip near the neck. Now there's a launch date and someone wants the box to look good on a shelf as well as survive a parcel network.
The box isn't decoration wrapped around a purchase. It's the layer that keeps the vial seated, upright, labeled and identifiable from the filling line to the customer's hands, and every choice inside it, cavity size, insert material, board caliper, panel area, has a mechanical consequence. Get the format right and the rest of the decisions get easier. Get it wrong and no amount of foil stamping rescues a vial that rattles.
Table of Contents
- Vial Box Formats Compared at a Glance
- Sizing a Vial Box for 3 ml and 10 ml Vials
- Inserts and Dividers That Hold Vials in Place
- How Vial Boxes Protect Glass in Transit
- Branding a Vial Box Without Crowding Required Information
- From Brief to Production Run
Vial Box Formats Compared at a Glance
The vial holds the product. The box is the outer layer that keeps that vial seated, labeled and protected on the way to the customer, and the format you choose sets a ceiling on protection that no finishing can lift.
| Format | Construction | Protection | Relative cost | Best for |
|---|---|---|---|---|
| Rigid board box with magnets | Rigid board shell, magnetic closure, insert required | Highest with an EVA or tray insert | Highest | Launches, gift sets, premium presentation |
| Rigid board box with EVA foam insert | Rigid board, cut EVA foam cavities | Highest | High | Maximum glass protection for fragile vials |
| Paperboard box with vacuformed tray | Folding carton, formed plastic tray | High | Moderate | Solid protection at controlled unit cost |
| Paperboard folding carton with divider | Folding carton, paperboard divider | Basic | Lowest | Light, low-risk shipments and sampling |
The top two rows share the highest protection rating because they solve two different problems. The rigid shell resists deformation; the foam stops the vial moving inside it. Remove either half and the rating drops.
Rigid board with magnets. A wrapped shell, a magnetic closure, an insert inside and a hinge that still holds after the first open. This is the format for a launch where the unboxing carries part of the pitch, and it's the one buyers keep. It's also heavier, and it changes your case pack as well as your unit price.
Rigid board with EVA. Cut foam holds each vial on its own footprint and deforms on impact instead of passing shock to the neck. Specify it when the glass itself is the risk.
Paperboard with a vacuformed tray. A folding carton holding a formed tray with fixed pockets, which gets you a real cavity at a controlled unit cost. It's the usual answer for a supplement or peptide line selling in volume.
Paperboard with a divider. Scored board walls separate the units at the lowest cost. Fine for light, low-risk shipments, but it separates rather than retains, so nothing stops a vial lifting out when the carton is inverted.
The cheap option that isn't
Loose vials in a bubble mailer is the cheapest thing you can do and the most expensive thing to get wrong. There's no fixed cavity, so units strike each other and every closure takes the load through the outer wrap. Fine for a sample handed to a colleague, not a shipping format for a paying customer.
It helps to get the layers straight early, since primary versus secondary packaging separates the container that touches the product from the carton that carries it. The volume difference between layers isn't subtle: an analysis of SARS-CoV-2 vaccine deployment in the WHO African Region found tertiary packaging volumes per dose often run about 10 times larger than secondary volumes per dose, because outer systems add insulation and thermal protection (PMC7430629). Your vial box sits in the compact, high-impact layer, the part that stays when the insulated shipper comes off at a subnational depot.
The category is large and the money is real. Vials represented $10.9 billion, or 28.5%, of the $38.2 billion global sterile pharmaceutical packaging market in 2025, according to Dataintelo's sterile packaging market report.
Three questions that pick the format
- What would a broken vial cost? Replacement, reshipment, a support ticket and a customer who now opens every order suspiciously.
- How much does the presentation carry the sale? If the box is photographed for a product page, the rigid shell earns its cost.
- How many SKUs will share one structure? One box across three strengths is cheaper than three boxes, provided the cavity handles all three formats.
Answer those and your shortlist is one or two formats. If your product sits in the peptide or research-compound world, where handling questions overlap with Herbilabs Labware's peptide vial box guide, the answers get clearer still. We work across flexible and rigid packaging, including pouches, cartons, boxes, sleeves and inserts, drawn against real production tolerances with die-lines and 3D mockups, so the format decision gets tested before it gets tooled.
Sizing a Vial Box for 3 ml and 10 ml Vials
Measure with the closure fitted, because the cap or the crimp usually sets the true height.
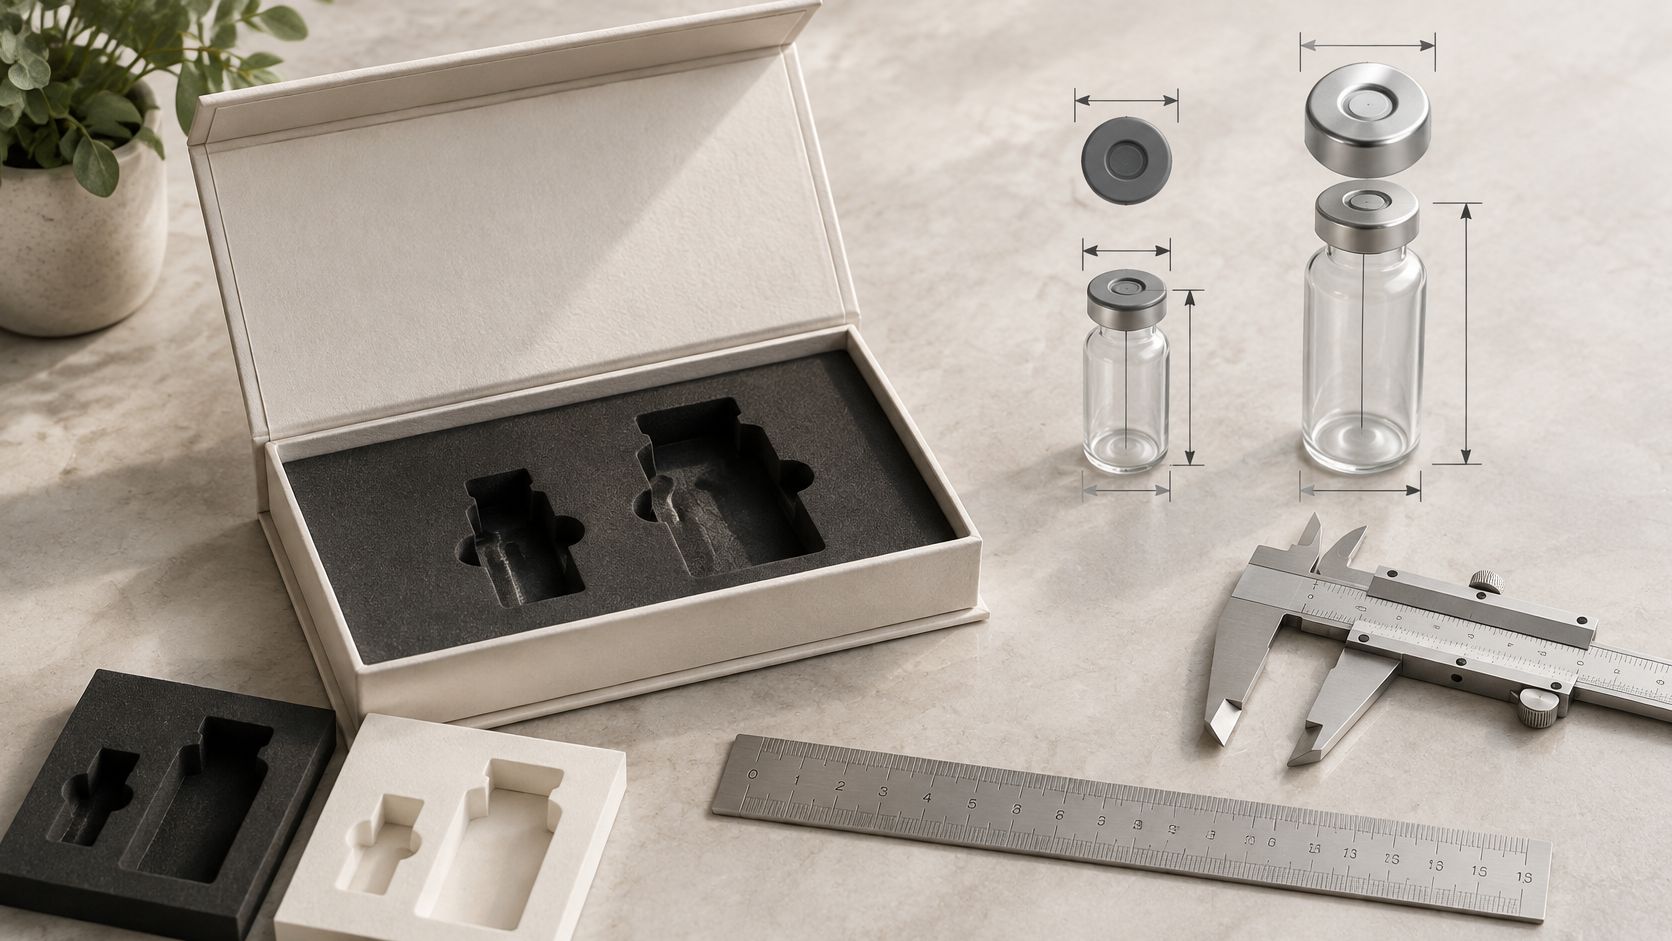
Two vials with different nominal volumes rarely differ in only one dimension. A 3 ml and a 10 ml format usually differ in body diameter and in overall height, and a crimp collar can be wider than the glass beneath it. Here's the sequence I'd run before any artwork exists.
- Measure each format with its closure. Body diameter, collar diameter if it's wider, total height with the cap fitted, and the closure profile. Measuring bare glass is the most common cause of a cavity that comes back a couple of millimetres short.
- Set a clearance target per format and write it on the spec. Enough gap to drop the vial in and lift it out without force, not enough to rattle. If the number isn't on the drawing, whoever cuts the tool picks one for you.
- Design the cavity to both limits, or split it. A shared box works when the insert carries two pocket sizes, or one pocket sized to the larger vial with a removable lining for the smaller.
- Count the panel area before you commit. Slots, label, closure hardware and warning text all compete for the same face. If the layout doesn't fit at prototype stage, it won't fit at production stage.
- Build a fit prototype in the shipping orientation. Vials travelling upright and vials travelling on their side load the insert differently, and one prototype can only prove one of them.
Write the clearance on the drawing. A tolerance that isn't specified isn't a decision, it's an outcome.
Where tolerance turns into breakage
Transport testing doesn't run one drop and call it done. ISTA's general simulation procedures stack stresses: 3-Series protocols can include random vibration, several drop heights and atmospheric conditioning such as tropical wet or winter frozen environments, and one 3E overview specifies a 0.54 overall Grms random-vibration level plus a compression test where a permitted method applies 1.4 times the calculated test force (ISTA test procedures).
That's the reason fit is an engineering argument rather than a preference. An insert that holds a 3 ml vial snugly but leaves clearance around a 10 ml vial lets the heavier unit travel under vibration, and an over-tight cavity passes compression straight into the glass. You should be able to hand a supplier four numbers per format: diameter, height, clearance and insertion force.
Inserts and Dividers That Hold Vials in Place
The insert does the holding. The shell only does the carrying, and a beautiful rigid box with the wrong cavity is a beautiful box with a broken vial inside it.
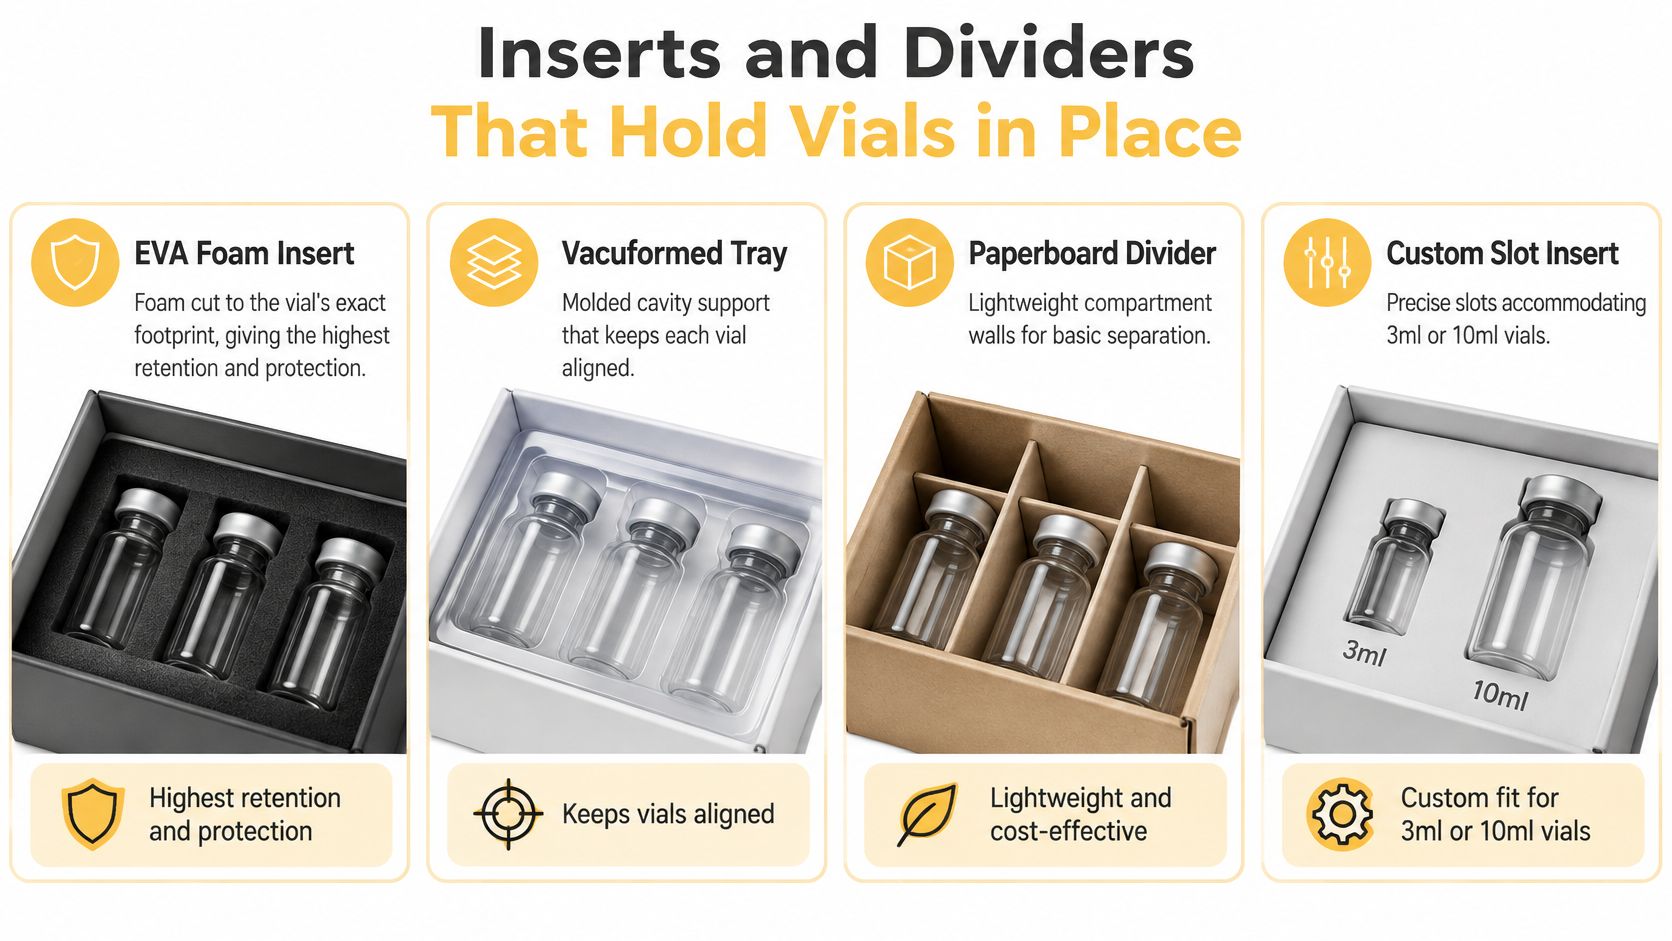
Comparing the four on the same criteria
- EVA foam cut to the vial's footprint. Highest retention and the best cushioning of the four, and the highest material and cutting cost. It's the default inside a rigid board box where the glass is the product's whole value.
- Vacuformed tray. Formed pockets keep each unit aligned and give a consistent insertion depth every time. More retention than a divider, less cushioning than foam, and the moderate cost that makes it the workhorse for paperboard cartons.
- Paperboard divider. Scored or die-cut walls separate units at the lowest cost. It separates without retaining, so it suits light vials in a carton that won't be inverted or stacked hard.
- Shared pockets for two formats. A slot that takes a 3 ml or a 10 ml vial needs to be sized to the tighter of the two fits, or split into two pocket sizes. One oversized slot technically fits both and secures neither.
Our structural design work treats closures, inserts, assembly steps and the way packs sit in a shipping carton as one problem, because a cavity that works alone can still fail once four cartons stack on top of it.
If you want to see how a formed cavity and a folding carton meet on a filling line, this walkthrough is worth four minutes:
The one test that separates them
Before you approve a drawing, load a full box, tilt it 45 degrees, shake once, then invert it.
The tilt-and-strike test: if any vial shifts more than the thickness of its own wall, or can reach a neighbour, the pocket is too loose. Fix it before the tool is cut.
Insertion force is the other half of the same test. If a customer needs two hands and a thumbnail to pull a vial free, the fit is too tight, and the glass absorbs that force on every unit. Measure pull force across ten units and put the range on the spec, because the difference between snug and seized is a millimetre. More on this sits in our guide to the basics of structural design.
How Vial Boxes Protect Glass in Transit
Every vial box has to survive four things: shock, vibration, compression and atmospheric conditions. That's the hazard list ISTA works from, and its guidance is blunt about sequence. Define the product's damage tolerance and the allowable package degradation before testing begins, not after (ISTA guidelines).
The carton's real job is to keep the vial's container-closure system intact: no contaminant ingress, no formulation loss, no unacceptable headspace change across shelf life. A fitted insert immobilizes the vial, clearance from the walls stops an external hit reaching the glass, and cavity depth keeps the cap and stopper away from anything pressing down on them (SGS container-closure integrity testing).
Four failures you'll actually see
| Symptom | Likely cause | Fix |
|---|---|---|
| Vial rattles or shifts in its slot | Cavity too large for the vial | Tighten the insert or add a cavity lining |
| Glass chips or cracks | Vial strikes a wall or sits loose | Add a cushion or wall and reduce clearance |
| Corners crush in the carton | Board too light or panels too small for stacking | Increase board caliper or reinforce corners |
| Closure damaged or seal weak | Cavity too tight, force transfers to the cap | Add clearance and test insertion force |
Inspect the glass, not the carton
A box can come back looking acceptable and still have done its job badly. A hairline crack at the neck, a stopper that's been pushed, a seal that's lifted: none of those show on the outside of a carton with a scuff on one corner. Open every unit in the test sample and check the closure as carefully as the body.
Acceptance rule: a vial that is intact, seated in its insert and free of closure damage is a protection pass. Crushed corners and scuffed print are cosmetic findings, logged separately, and only become a failure when the structure they signal lets the vial move.
Carton board doesn't insulate. For temperature-sensitive, sterile or biologic product, the box needs a controlled interface with an insulated shipper or a secondary barrier, and its geometry changes the stresses on the vial system without establishing container-closure integrity by itself. If your vials ever travel outside a carton, the retention problem reappears in a different shape, which is what peptide vial storage cases solve for storage and short trips.
Branding a Vial Box Without Crowding Required Information
The layout question gets settled before anyone picks a finish: the decorative system never hides information a customer needs. A panel map drawn first gives foil and emboss somewhere to live. Skip it, and the foil stamp lands on the batch number.
Map the panels before anyone opens a design file
- Front: product name, variant and brand mark, plus strength where strength is the primary identifier.
- Side: the compliance panel, holding warnings, dosage, batch and QR information.
- Back or base: usage notes, storage conditions, contact details.
- Closure face: almost nothing; regulation sets that limit.
One carton carrying both a 3 ml and a 10 ml vial needs this map tested on the smaller format first, with the longest variant name in the range. A wordmark that breathes on the tall box crowds the short one, and a name that fits the front panel at one strength can wrap toward the compliance side at another. An assembled proof at the smallest format, carrying the longest name and statement, shows where the system breaks before the die-line does.
That closure limit is why the carton carries so much. The United States Pharmacopeia's revision to General Chapter <1>, published in USP 34-NF 29 on November 1, 2010 and official from December 1, 2013, limited text on the circular top surface of a ferrule or cap overseal to cautionary statements intended to prevent an imminent life-threatening situation (USP statement on ferrules and cap overseals). Information that can't sit on the closure moves to the label, the carton, the package insert or another approved surface. The carton is usually the surface with room.
Finishes that earn their space
Magnetic closure for a premium feel, foil for the wordmark, emboss or deboss for texture, a specialty laminate for scuff resistance. Each takes physical space, and each can obscure type where it's placed carelessly, so finish areas belong on panels that don't carry controlled content. Quantity, identity and approved information stay readable; the decoration works around them, never across them.
There's a functional argument for protecting the readable face too. A review of reminder packaging studies found that all 17 reviewed studies reported positive effects, with evidence synthesized across 22,858 subjects and 52 reports (PMC7495276). A dose cue printed where a thumb rests wears away first. Put it where the hand doesn't go.
Existing artwork adapts to a carton when its resolution, format and composition suit the print process: an outlined vector wordmark survives, a small logo lifted from a web page doesn't. For hierarchy and type on a tighter panel, how to design a product label that looks good covers the same problem at smaller scale.
From Brief to Production Run
Vial box projects tend to lose time in the same place. The brief arrives with a product name and a reference image, and the first prototype reveals that nobody measured the vial. That prototype is also the cheapest point in the whole project at which to find out.
The brief checklist
Complete these seven items before you contact a supplier. Each becomes an input to the die-line, and each missing one becomes a revision later.
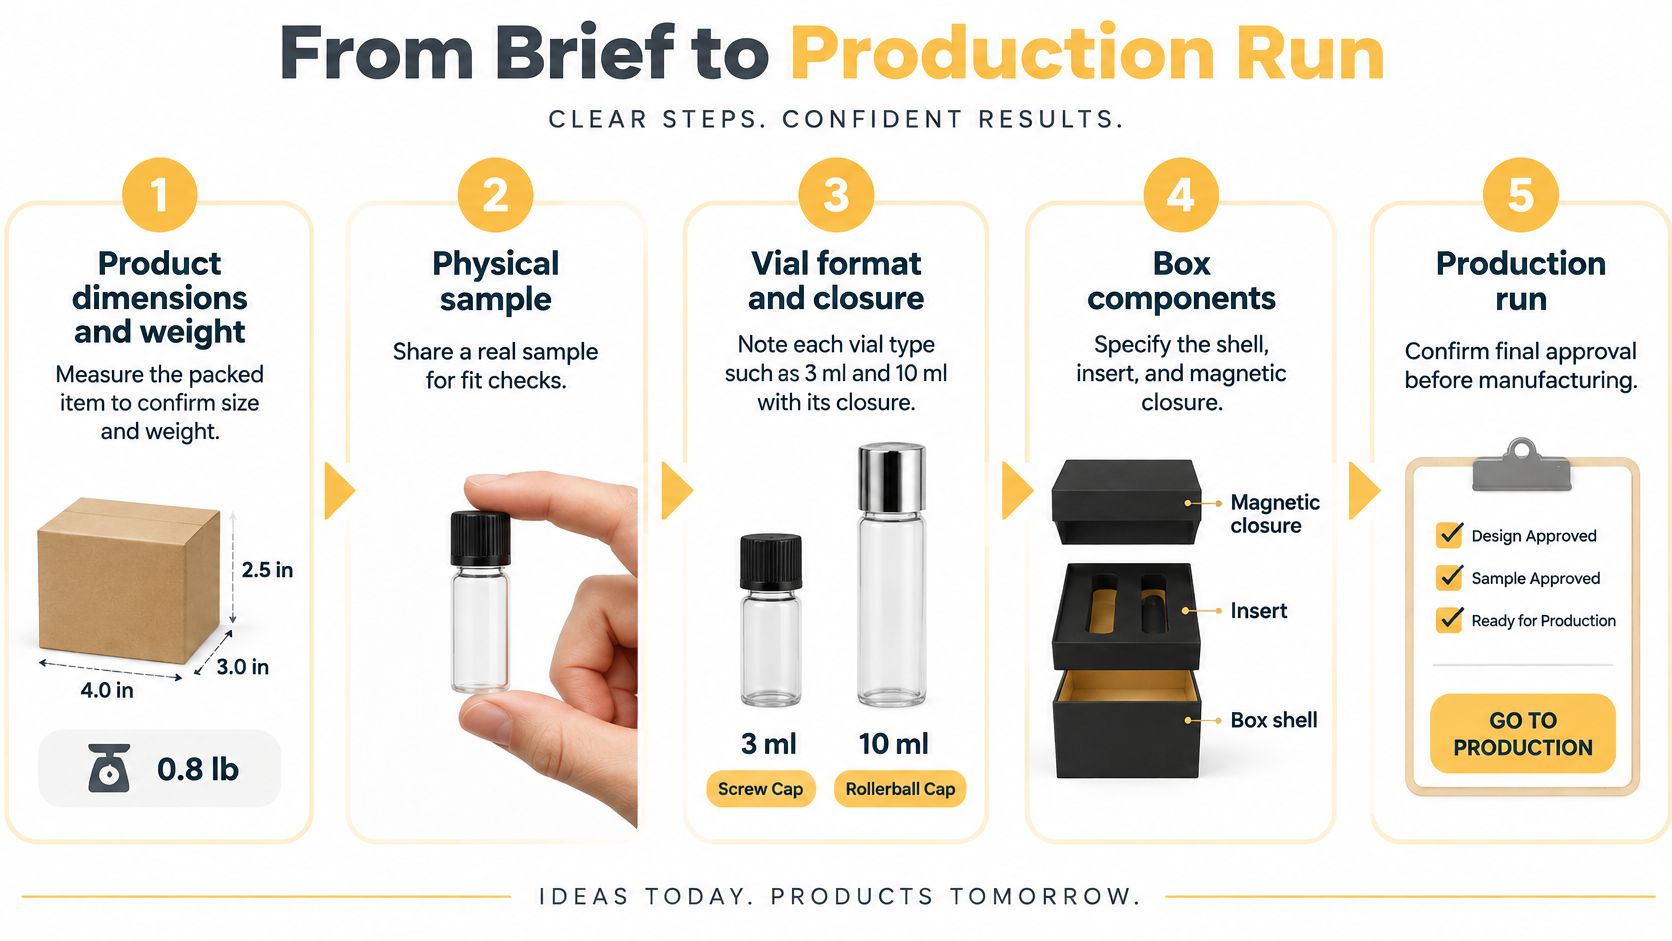
- Dimensions and weight of the packed unit. Vial, closure and insert together, plus filled weight.
- A physical sample. Two if you can spare them. Calipers on a real vial beat a spec sheet every time.
- Every format the box must accept. A 3 ml and a 10 ml vial with their closures is a different brief from a single-vial carton.
- The components inside. Shell, insert, divider, magnet, leaflet.
- Prototype and production quantities. They set the process, and the process sets the minimum.
- Who supplies and who approves artwork. Name one approver rather than a committee.
- Proof-to-sign-off steps. How many rounds, and what counts as approved.
We ask for product measurements, weight and samples where they exist, because a box drawn from a nominal size is a guess with a die-line around it. Here's the path from those inputs to a delivered run:
Six gates from die-line to delivery
- CAD model and die-line review. Check the cavity tolerance stack-up against your dimension record. Half a millimetre of clearance per side becomes a documented decision instead of an accident discovered in a shipping test.
- Physical fit prototype in both formats. Record insertion force, retention and clearance for the 3 ml and the 10 ml separately. One box serving both sizes usually means an insert tuned around the smaller vial inside a cavity sized for the larger, and each combination needs its own pass. A proof that holds the 10 ml snug can still leave the 3 ml rattling.
- Transport testing in the shipping orientation. Shock, vibration, compression, with damage limits written down first. ISTA's design guidance doesn't permit reduced test levels, shortened times, a changed test order or omitted tests, though overtesting is allowed (ISTA getting started with design). Testing only one vial size can conceal looseness, over-pressure or weak panel geometry in the other, which is exactly the risk in a dual-format box. ISTA's free-fall guidance for packaged products up to 150 lb calls for 10 drops per sequence, from 30 inches at 75 lb or less, 24 inches from 75 to 100 lb and 18 inches from 100 to 150 lb, onto a flat, firm, nonyielding steel base with the contents inspected after testing (ISTA package testing under 150 lbs). A small vial box sits in the lightest band, and ten drops find a loose cavity faster than any drawing review.
- Physical prototype review before the structure is committed. Hold it, open it, drop it into a case pack, hand it to someone who has never seen it. A structural review at this stage costs a prototype; the same change after tooling costs a die.
- One representative assembled proof, then extend. Build a single proof with production print and finish, check colour, copy and fold behaviour, then extend the system across SKUs, checking smaller containers, longer statements and different physical formats as you go. Skipping the single-proof step multiplies every error by the size of the range.
- Specification approval under documented change control. The spec should name the vial and closure components, insert material, carton grade, assembly process, test sample size, transport conditioning and acceptance criteria. A change to board caliper, insert geometry, closure supplier or print finishing should trigger a written risk assessment and a requalification decision. Where the box is part of a validated packaging configuration, that record belongs inside a quality system along the lines of ISO 15378, which applies GMP-oriented requirements to organizations that design, manufacture and supply primary packaging materials. Package integrity is assessed separately from sterility: USP <1207> and USP <382> call for evaluation against a product-specific maximum allowable leakage limit, so the sample size and method belong in the written spec rather than in an assumption.
Where material reduction is safe
The carton is usually the lowest-risk place to take material out, and also the place where removing it goes wrong fastest. Industry reporting on pharmaceutical packaging makes a related point: sustainability constraints tighten as you move toward product-contact layers, which leaves the secondary carton at the forgiving end of the range (Label and Narrow Web on pharmaceutical packaging sustainability).
The useful question isn't whether a vial box can be recyclable. It's which change cuts impact without pushing damage, waste or regulatory risk somewhere else. Board caliper, recycled content, coating, insert material and case-pack density all trade against compression strength, moisture protection, tamper visibility, serialization space and print legibility. Run the lighter structure through the same acceptance criteria before you put the saving in a claim.
Packaging design discussions don't establish product safety or market authorization. Confirm the requirements for your product and your market with the responsible team before you approve a specification.
Mylarmen builds vial box systems end to end: format selection, structural engineering, die-lines, 3D mockups, physical prototypes and the production run, with one contact from approved artwork to delivered stock. Bring your 3 ml and 10 ml vials, or a single vial with its closure, and we'll size the cavity, specify the insert and review a physical prototype before the structure is committed. Start with your dimensions and a sample at Mylarmen.
Made with Outrank